
Household odor removal works best when you treat a smell as evidence, not as a request for more fragrance. Start by screening for hazards, classify what you smell, locate the strongest source, identify the affected material, remove residue, clean within the material’s limits, dry the deepest layer, and then recheck.
This source-first method keeps a small spill from becoming a whole-room project and helps reveal when an odor comes from padding, a wall cavity, a drain, a filter, or another layer routine surface cleaning cannot reach. Ventilation can support the process when conditions are safe; EPA indoor air guidance explains broader indoor-air considerations.
Stop before cleaning when the odor is gas-like, electrical, strongly chemical, connected to sewage or floodwater, or accompanied by soot, fire damage, widespread moisture, or visible growth. Leave the area when needed, avoid switches or ignition sources around a possible gas leak, and follow emergency, utility, fire, building, or professional guidance.
Quick Answer: Remove the Source Before You Deodorize
The Five-Part Odor Sequence
A practical sequence is: screen for danger, locate the source, remove the odor-producing material, clean the affected surface correctly, and dry it before a neutral recheck. Classification and material depth sit inside that sequence. They tell you whether a removable bin, washable textile, cushion fill, carpet pad, or building material needs attention.
What Fragrance and Absorbers Cannot Do
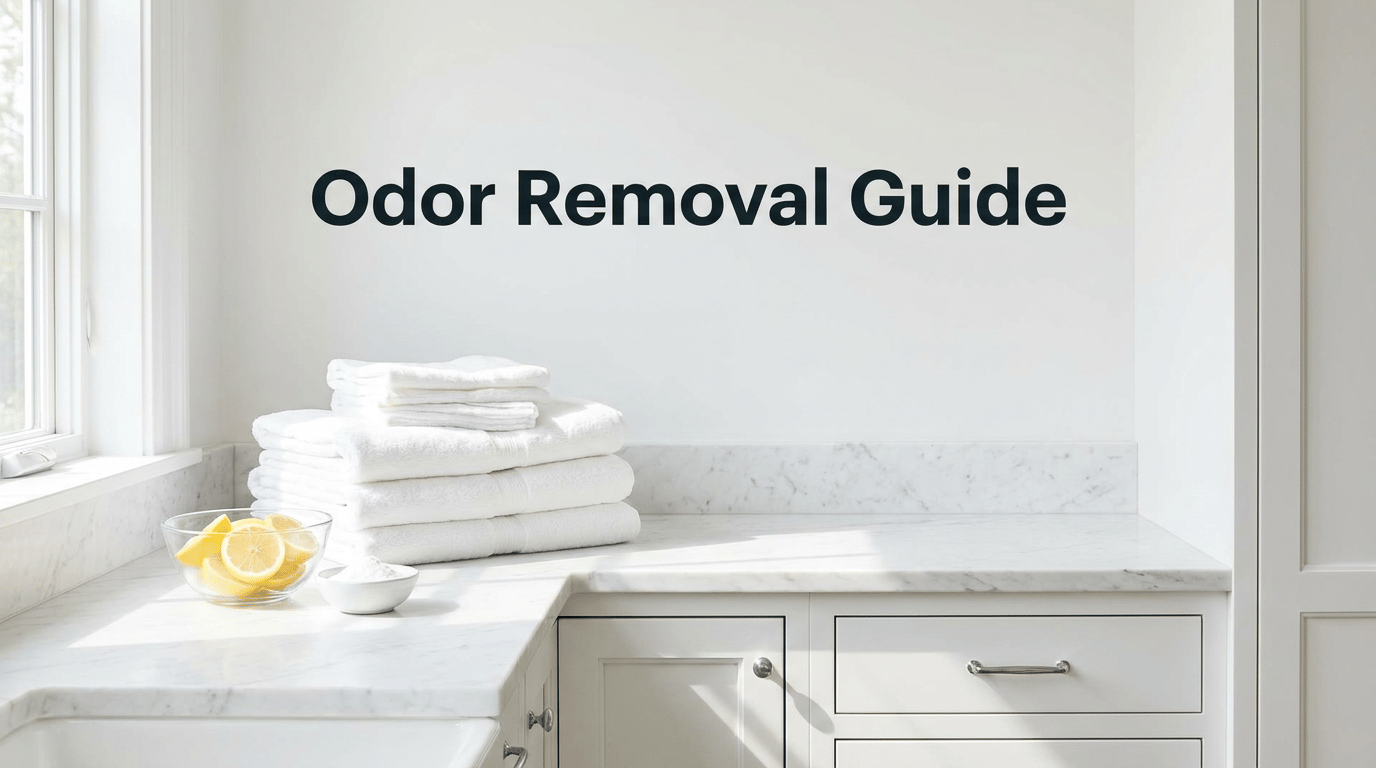
Candles, sprays, essential oils, scented powders, and bowls of absorbent material may change what you notice in the air, but they do not remove wet residue, grease film, urine below a surface, spoiled food, smoke deposits, or a moisture source. Fragrance also makes it harder to judge whether the original smell remains.
The First Safety Stop
Do not investigate a gas-like or electrical odor by moving through the home with cleaners or powered equipment. Strong fumes after products were combined also require fresh air and poison-safety guidance, not another chemical to neutralize them. Fire, sewage, and flood contamination need controls beyond routine freshness work.
Step 1: Classify the Odor
Musty or Earthy
A musty or earthy smell often points toward damp porous material, stored textiles, cardboard, dust held in a humid area, or microbial growth. Check for a moisture source before deodorizing. EPA mold odor guidance gives useful context, but smell alone cannot identify the extent or cause of a growth problem.
Sour, Damp, or Textile-Like
Sour or damp textile odors can come from fabric that dried slowly, a wet cleaning cloth, a hamper, towel, cushion, or laundry left in a machine. Separate movable textiles from the room and smell them individually. Do not return washed material until seams, fill, folds, and other thick areas are fully dry.
Pet or Urine-Like
Pet odor may sit on a washable cover, sealed floor, upholstery fabric, cushion fill, carpet backing, or pad. Use light and touch to find changed texture or residue, while avoiding direct skin contact. The surface where odor is strongest may not be the deepest affected layer.
Food, Grease, or Trash
Food and trash odors usually have a removable source: spoiled contents, drips below a liner, residue around a lid, crumbs, packaging, or grease film near cooking areas. Remove the contents first. Then match cleaning to the bin, cabinet, appliance, paint, stone, wood, or textile involved.
Smoke or Burnt
A burnt smell during active use can signal an electrical or fire hazard and should not be treated as ordinary smoke residue. After the source is confirmed safe, smoke odor may remain in dust, washable fabric, painted surfaces, unfinished material, upholstery, or ventilation components. EPA particulate matter guidance describes particulate sources in indoor environments.
Drain, Sewer-Like, Chemical, Gas-Like, or Electrical
Drain odor can relate to trapped debris, a dry trap, plumbing problems, or inaccessible contamination. Sewer-like, gas-like, electrical, and strong chemical odors require a safety decision before inspection. Do not mix products, open unknown containers, operate switches near suspected gas, or lean into confined spaces to find the source.

Step 2: Locate the Strongest Source
Close the Room Briefly and Reenter
When no hazard is suspected, remove fragrance sources, ventilate briefly, then close the room for a short period. Reenter from neutral air and note where the smell is strongest. Keep the test brief in hot, humid, poorly ventilated, or occupied spaces, and never close a room to concentrate potentially dangerous fumes.
Follow Edges, Seams, Containers, and Soft Materials
Check where residue collects: bin rims, cabinet corners, upholstery seams, carpet edges, under removable mats, around laundry containers, and along transitions between materials. Smell near a surface without pressing your face against it. Gloves may be appropriate when residue, pests, waste, or an unknown substance is possible.
Compare the Room With HVAC On and Off When Safe
If the odor changes when heating, cooling, or a fan operates, airflow may be moving a nearby smell or the equipment may need inspection. Do not dismantle HVAC equipment. Check accessible filters only as the manufacturer directs and stop if you notice electrical odor, overheating, soot, moisture, or contamination inside inaccessible components.
Remove Small Movable Suspects Before Cleaning the Largest Surface
Move a washable mat, trash bag, damp towel, pet blanket, or food container out one at a time, then recheck. This isolates likely sources without soaking a carpet or wiping every wall. Keep removed items contained so residue does not transfer to clean flooring, laundry, furniture, or outdoor storage.
Step 3: Identify the Material and Odor Depth
Sealed Hard Surfaces
Sealed tile, laminate, glass, metal, and properly finished surfaces often hold residue near the surface, but seams and damaged finishes can let liquid travel deeper. Read the product label and surface-care instructions. Use limited moisture, rinse when directed, and stop if the finish clouds, softens, transfers color, or swells.
Washable Fabric
For removable washable fabric, check the care label, stain-treatment directions, washer capacity, and drying options. Remove solid residue before laundering. Avoid combining products or improvising heat settings. A fabric that smells clean while scented or warm may reveal remaining odor after it cools and the product scent fades.
Upholstery and Cushion Fill
Upholstery can hide liquid below the face fabric. Check the manufacturer’s cleaning code and instructions before adding moisture. Light surface odor may need vacuuming or approved spot care; odor that returns from cushion fill after complete drying is a different problem and may require professional cleaning or replacement.
Carpet Fibers, Backing, and Pad
A carpet surface can look clean while backing or pad still holds residue. Blot rather than flood, use only carpet-approved products, and follow extraction and drying instructions. If odor returns in the same footprint, spreads when humidity rises, or reaches the subfloor, surface treatment alone is unlikely to solve it.
Porous Building Materials and Storage Materials
Unsealed wood, drywall, fiberboard, ceiling tile, paper, and cardboard absorb liquid and smoke more readily than sealed surfaces. Remove disposable contaminated storage material when safe. Swelling, softness, staining, delamination, or repeated moisture calls for damage assessment rather than repeated deodorizer application.
Airflow, Filters, and Vents
Odor near a vent may originate in the room, be carried from another space, or sit in accessible dust and a serviceable filter. Follow the equipment manual for filter type and service timing. Do not spray cleaners into ducts, motors, registers, or powered equipment, and do not assume every circulating odor begins inside HVAC.

Step 4: Remove Residue Before Deodorizing
Dry Debris and Loose Material
Pick up solids, discard spoiled contents, vacuum suitable dry debris, and remove loose soil before wet cleaning. Use a vacuum only when the material is dry and the debris is appropriate for that machine. Do not vacuum liquids, hot ash, unknown powders, pest waste, or hazardous debris without equipment and guidance intended for it.
Damp or Organic Residue
Blot fresh liquid with absorbent material and work from the outside inward when the surface allows. Remove washable covers or items without spreading residue. Choose a cleaner approved for both the soil and material, follow label directions, and keep moisture within what the backing, fill, flooring, or finish can dry safely.
Film From Smoke, Grease, or Body Oil
Smoke, cooking grease, and body oil can form a film that holds odor and attracts dust. Dry dusting alone may move particles without removing film. Use a material-compatible cleaner in small sections, change cloth faces as they soil, and follow instructions for ventilation, rinsing, protective equipment, and disposal.
Why One Cleaner Does Not Fit Every Source
An upholstery product may be wrong for wood; a degreaser may damage paint; an acidic cleaner can harm some stone; and a disinfectant is not automatically an odor remover. Identify the residue and material first. Never mix or layer products, and do not assume a natural ingredient is safe for every finish, child, or pet. CDC cleaning guidance explains the distinction between routine cleaning and situations where disinfection may be appropriate.
Step 5: Dry and Recheck Without Fragrance
Dry the Thickest Layer
Drying is complete only when the deepest affected layer is dry, not merely the visible face. Check carpet edges, cushion seams, under mats, folded fabric, grout lines, and cabinet joints. Use airflow or equipment only when compatible with the material and conditions; heat can set stains or damage adhesives and finishes.
Wait for Product Scent to Fade
A fragranced cleaner can temporarily dominate the room. Follow the label’s ventilation and drying directions, then wait until the added scent has faded enough to judge the original odor. Do not keep applying product during that waiting period, because residue and mixed scents make the result harder to interpret.
Close-and-Reenter Test
After the material is fully dry and the room has returned to normal conditions, leave for fresh air and reenter. Check the original spot, nearby edges, and the room entrance. A neutral recheck is more useful than sniffing continuously, which can make a persistent smell less noticeable.
What It Means When the Odor Moves
If the strongest smell shifts after one item is removed, you may have found one source among several or changed airflow around the room. Reclassify the new location before cleaning. Avoid responding by coating a wider area, because that can create extra moisture or residue without identifying the second source.
What It Means When the Same Spot Returns
Odor that returns at the same spot after full surface drying suggests residue remains below the surface, moisture is recurring, or the material cannot be cleaned adequately in place. Stop repeating the same treatment. Inspect accessible layers and seek material-specific or professional guidance when padding, subfloor, wall cavities, or equipment may be involved.
Odor Absorbers as a Finishing Step
When a Dry Absorber May Help
A label-compatible dry absorber may help with faint residual odor in a clean, fully dry, accessible area. It is a finishing option, not the diagnosis or source-removal step. Keep it contained where appropriate and follow product directions for amount, dwell time, removal, ventilation, and disposal.
When Powders Create Residue
Loose powder can settle into carpet backing, upholstery seams, rough wood, electronics, vents, and pet-accessible areas. It may be difficult to remove and can leave visible or abrasive residue. Check the material and vacuum instructions before use; skip powder where complete recovery is uncertain.
Why Bowls, Candles, Sprays, and Essential Oils Do Not Remove Sources
A bowl or scented product changes the air near it but does not remove dampness, urine, grease, smoke film, spoiled material, or contamination. Candles add combustion risk, and essential oils are not automatically safe around children, pets, fabrics, finishes, or people sensitive to fragrance. Source removal remains the main work.
Pet, Child, Surface, and Product-Label Limits
Store products in original containers and keep powders, liquids, buckets, and treated areas out of reach as the label directs. Consider licking, paw contact, crawling, and transfer to toys or bedding. Do not use a product on food-contact surfaces, textiles, or pet areas unless its directions allow that use and any required rinse is completed.
Choose the Correct Specialized Workflow
Musty Storage or Basement Clues
Musty closets, stored belongings, and basements share a moisture question but not one universal cleanup. Identify damp cardboard, textiles, walls, flooring, or condensation and correct accessible moisture conditions. If the issue is in clothing, musty smell needs a fabric-specific approach rather than room deodorizer. Recurring basement moisture belongs in a building-level assessment.
Clothing and Towel Odor
Textile odor requires care-label decisions, adequate washer capacity, appropriate detergent use, thorough rinsing, and complete drying. Clothing exposed to smoke needs a different method from musty or slowly dried towels because the residues and care limits differ. After the source is handled, how to make a room smell fresh naturally can support comfort without replacing laundering. Do not prescribe one temperature, additive, or wash frequency for every fiber.
Carpet and Upholstery Odor
First decide whether the odor is on the face material or below it. Upholstery codes, carpet guidance, cushion construction, backing, pad, dyes, and drying conditions determine the method. Targeted upholstery care such as how to remove pet smell from couch and material-depth guidance for how to remove odors from carpet belong in their own workflows rather than turning this pillar into an extraction tutorial.
Pet Residue
Pet residue can affect bedding, sealed floors, upholstery, carpet, pad, or baseboards. Locate the actual footprint and protect children and animals from products and wet areas. Repeated marking, inaccessible cushion fill, broad contamination, or material damage needs a targeted pet-residue method rather than repeated whole-room fragrance.
Smoke and Cooking Film
Smoke and cooking odors can persist because particles and oily film settle on different materials. Whole-house smoke requires broader decisions about soot, HVAC, porous contents, and fire history. Routine cooking film usually calls for source control and material-safe degreasing, not a full smoke-restoration process.
Bathroom, Trash, Drain, and Food Sources
Bathrooms, bins, drains, and food storage each need a focused diagnosis: damp textile, plumbing, residue under a liner, spoiled food, appliance drip, or inaccessible leakage. Remove disposable sources and follow appliance, plumbing, and surface instructions. Keep each method tied to the source rather than expanding this pillar into a room-by-room checklist.

Common Odor-Removal Mistakes
Cleaning the Whole Room Before Locating the Source
Whole-room cleaning can spread residue, wet unaffected materials, and obscure the original location. Start with the strongest source and a defined footprint. Expand only when the evidence shows multiple affected materials, widespread film, or airflow carrying odor from another area.
Adding Fragrance During Diagnosis
Fragrance competes with the odor you are trying to locate. Pause candles, plug-ins, sprays, scented powders, and essential oils during diagnosis and recheck. This also prevents a new product scent from being mistaken for progress or from triggering unnecessary repeat cleaning.
Over-Wetting Carpet or Upholstery
More liquid does not guarantee deeper cleaning. It can move residue into backing or fill, spread the affected area, slow drying, and create water marks or material damage. Follow the carpet or upholstery instructions, work in controlled amounts, and stop when safe extraction or drying is not realistic.
Returning Fabric Before It Is Fully Dry
A slightly damp towel, cover, cushion, mat, or blanket can transfer moisture back to furniture, storage, or flooring. Check seams, folds, fill, and thick edges before return. If weather or equipment cannot dry the item safely, keep it separate and choose another approved drying option.
Repeating the Same Product on Different Materials
A successful cleaner on tile may be unsuitable for stone, wood, carpet, paint, or fabric. Recheck labels and care instructions at every material transition. Do not layer a second product over the first; rinse or remove residue only as directed and allow the area to dry before reassessing.
Ignoring Cleaning Tools, Bins, Filters, and Storage Areas
A dirty mop head, vacuum component, brush, caddy, bin rim, hamper, or stored cloth can reintroduce odor. Clean reusable tools and service filters according to their manuals and actual use. Avoid fixed schedules that ignore soil load, pets, equipment design, or manufacturer replacement guidance.
Treating Moisture, Sewage, Gas, Electrical, Soot, or Fire Odor as Routine Freshness
These conditions can involve contamination, combustion, hidden damage, or urgent hazards. Stop masking the smell and limit exposure. Contact the appropriate utility, emergency service, building professional, restoration specialist, or public-health authority based on the source. Routine household cleaner is not a substitute for hazard control.
Prevention Based on the Source You Found
Improve Drying for Damp Fabric
Give towels, mats, cleaning cloths, cushions, and laundry enough space and airflow to dry according to their care instructions. Avoid folding or closing damp material into hampers, cabinets, or storage. Correct recurring indoor moisture rather than relying on fragrance or repeatedly washing items that become damp again.
Remove Residue Earlier
Pick up food, empty leaking packaging, blot suitable fresh spills, and remove pet residue before it travels into seams or porous layers. Early action is about limiting depth, not promising stain or odor removal. Check the material first and avoid scrubbing, heat, or excess liquid that can make damage worse.
Protect Pet Resting Areas
Use washable, care-label-compatible covers where practical and inspect the layers beneath them after accidents. Keep pet bedding dry, clean tools after use, and store products securely. Protection should make residue easier to locate and remove without exposing animals to wet treatments, loose powders, or concentrated fragrance.
Maintain Bins, Filters, and Cleaning Tools
Empty and clean bins based on leakage and use, let washable tools dry, and follow appliance manuals for filters and serviceable parts. A calendar can remind you to inspect them, but visible soil, odor, household load, and manufacturer directions should determine the actual cleaning or replacement decision.
Correct Moisture or Smoke Conditions Instead of Masking Them
Repair accessible leaks through the appropriate trade, improve source control during cooking, keep combustion equipment maintained, and follow building guidance for ventilation. Recurrent condensation, smoke entry, or moisture in walls, roofing, foundations, or HVAC needs correction at the source; deodorizer cannot make those conditions stable.
When Normal Household Odor Cleaning Is Not Enough
Water Damage, Recurring Moisture, or Visible Growth
Cleaning a visible surface does not correct a leak, condensation pattern, wet insulation, or moisture behind a finish. Widespread wet material, repeated dampness, swelling, softness, or visible growth warrants moisture and damage assessment. Limit disturbance of unknown growth and follow current building and public-health guidance.
Fire, Soot, Wildfire, or Long-Term Smoke
Soot and fire residue can affect air, surfaces, contents, insulation, and ventilation equipment. Do not dry-brush or vacuum unknown soot with ordinary equipment. Fire-damaged structures, wildfire residue, and long-term smoke contamination may require fire officials, insurers, restoration specialists, and material-specific handling.
Sewage, Floodwater, or Biological Contamination
Sewage and floodwater can carry contamination beyond what smell reveals. Avoid direct contact, keep people and pets away, and do not use routine carpet or upholstery cleaning as a substitute for contamination control. Follow local authority, public-health, building, and qualified restoration guidance for cleanup and disposal.
Gas-Like, Electrical, or Strong Chemical Odor
Leave a suspected gas or electrical hazard and follow emergency or utility instructions. Do not operate switches, unplug equipment, light flames, or search with powered tools when gas may be present. After strong cleaner fumes or product mixing, move to fresh air and seek Poison Control or emergency guidance; never add another chemical.
Odor Inside Walls, Padding, HVAC, Subfloor, or Other Inaccessible Layers
Repeated surface treatment cannot reliably reach a wall cavity, carpet pad, subfloor, duct component, deep cushion fill, or sealed assembly. Odor that tracks with weather, equipment cycles, moisture, or one structural location needs inspection. Avoid drilling, opening, or saturating assemblies without knowing what utilities and materials are present.
Frequently Asked Questions
What Is the Best First Step for Removing a Household Odor?
Screen for danger, remove fragrance, and locate the strongest source before choosing a cleaner. Remove disposable or movable odor-producing material first, then identify the affected surface and depth. Cleaning the entire room too early can spread residue and make the source harder to isolate.
Why Does a Smell Return After Cleaning?
Residue may remain below the cleaned surface, the area may still be damp, airflow may be carrying odor from elsewhere, or the source may be active again. Let the material dry fully and perform a neutral recheck. A return to the same spot is a reason to inspect depth, not simply add product.
How Do I Tell Whether an Odor Is in the Air or a Material?
Remove small movable suspects one at a time, compare locations, and note whether the odor changes with safe airflow. If one item or spot remains strongest after ventilation, material is likely involved. If it follows HVAC operation or moves between rooms, investigate airflow and connected sources without dismantling equipment.
Does Baking Soda Remove Household Odors?
Baking soda can function as a dry finishing absorber in some clean, dry, compatible settings, but it does not remove moisture, residue, smoke film, urine below a surface, sewage, or spoiled material. Powder can also remain in carpet, upholstery, vents, and rough finishes, so check product and material directions.
Should I Disinfect a Surface Because It Smells?
Odor alone does not show that disinfection is needed. Remove visible soil and clean first. Use a disinfectant only for an appropriate situation and compatible surface, following the label for contact time, ventilation, rinsing, and storage. A smell is not evidence that every nearby surface needs a stronger product.
How Long Should I Wait Before Rechecking an Odor?
Wait until the affected material is fully dry and the cleaner’s scent has faded enough to judge the original smell. There is no single time for every carpet, cushion, textile, room, or climate. Thickness, airflow, humidity, product directions, and material construction determine when a meaningful recheck is possible.
When Should I Get Professional Help?
Get appropriate help for gas-like or electrical odor, strong chemical fumes, fire or soot, sewage, floodwater, widespread moisture, visible growth, valuable materials, or odor inside inaccessible layers. Also escalate when repeated material-safe cleaning leaves the same source, damage is developing, or safe drying and inspection are not possible.

Final Thoughts
A durable odor-removal plan follows the evidence: screen for hazards, classify the smell, locate its strongest source, identify the material and depth, remove residue, clean within label and care limits, dry the deepest layer, and recheck without fragrance. Absorbers belong at the end, if they are suitable at all.
Keep specialized workflows narrow so a closet, basement, textile, carpet, pet, smoke, cooking, bathroom, or trash problem gets the right material-specific treatment. Stop routine cleaning when moisture, contamination, combustion, utilities, inaccessible layers, or structural damage require trained inspection or emergency guidance.

Ethan Carter is the Founder & Editor of HomeCleanSecrets. Based in the United States, he has 5 years of experience creating practical home cleaning, laundry care, stain removal, decluttering, and home organization content. His goal is to help everyday households clean smarter and build simple routines that are easier to maintain.
Read more about Ethan Carter on his author page: https://homecleansecrets.com/ethan-carter/