
Quick answer
Unplug the appliance, remove and wash the crumb tray, turn the toaster over and gently shake out loose crumbs, loosen stuck bits with a soft brush, and wipe the exterior with a mild cleaner. Keep water out of the heating slots and do not insert metal tools where elements are exposed. This routine removes debris without harming heating elements or creating an electrical hazard.

Before you start
First steps
Unplug the toaster and let it cool completely. Empty the removable crumb tray and wash it separately. Work on a protected surface so crumbs and debris fall onto a towel or tray. Use a soft, dry brush to clear the slot edges and a damp cloth to wipe the outside when needed. Only plug the appliance back in once all parts are dry.
What to avoid
- Cleaning while the toaster is plugged in.
- Spraying cleaners or water directly into the slots.
- Using knives or metal utensils inside the toaster.
- Submerging the main toaster body in water.
- Abrasive pads on stainless steel finishes that can scratch protective coatings.
Why toasters need regular cleaning
Regular cleaning helps the toaster operate safely and reduces persistent odors.
Crumbs collect inside
Every use drops crumbs and small food particles into the bottom of the toaster. Over time these crumbs collect near the heating elements and in corners where they are not easily visible. Removing this debris prevents larger buildups that are harder to clean and may interfere with the mechanism.
Burnt crumbs cause odors
Trapped crumbs can overcook during toasting and produce a burnt smell. Occasional cleaning removes residue that generates persistent odors.
Grease and dust on the exterior
Grease splatters, flour dust, and fingerprints collect on exterior surfaces. Cleaning the outside keeps the toaster sanitary and helps finishes look their best without damaging coatings.
For a related walkthrough, see our guide to how to clean stainless steel appliances.
For a related walkthrough, see our guide to how to clean garbage disposal.
For a related walkthrough, see our guide to how to clean cutting board.
For a related walkthrough, see our guide to how to clean dishwasher filter.
Signs your toaster needs cleaning
Watch for these signs so you can clean the toaster before small issues become bigger problems.
Burnt smell when toasting
If a burnt odor appears during use, trapped crumbs or residue are likely charring. A thorough crumb removal and slot cleaning often resolves the smell.
Smoke during use
Light smoke can come from burning crumbs. If you see smoke, unplug the toaster and allow it to cool before inspecting and cleaning the interior. If smoke persists after cleaning, stop using the appliance and consult the manufacturer or a repair professional.
Crumbs falling out
If crumbs fall out of the bottom or sides when you move the toaster, the crumb tray is full or debris is stuck. Empty the tray and shake the toaster gently to dislodge remaining crumbs.
Uneven toasting
Uneven toasting can result from crumbs or residue near the heating elements or from damaged internal components. Cleaning can help; if the problem continues, have the toaster inspected or consider replacing it.
Step 1: Unplug and let cool
Why this matters
Unplugging prevents electric shock and accidental activation. Cooling protects you from burns when you touch internal parts or the crumb tray.
How long to wait
Wait until the toaster is completely cool to the touch before handling. After heavy use, allow additional time for the appliance to cool fully.
What not to touch
- Do not touch heating elements while they are warm.
- Do not pull on the power cord; grip the plug to unplug.
- Do not insert your hand into slots while the toaster is plugged in.
Step 2: Remove and clean the crumb tray
The crumb tray catches most loose debris and is the easiest place to start. Cleaning it frequently prevents buildup inside the toaster body.
Locating the crumb tray
The crumb tray is usually a flat metal or plastic tray that slides out from the bottom or rear of the toaster. Consult your manual if you are unsure where to access it. If your model has a removable tray, do not tip the toaster to empty it before removing the tray.
How to wash the tray
- Slide the tray out onto a protected surface.
- Brush off loose crumbs into the trash.
- Wash the tray with warm, soapy water using a nonabrasive sponge or cloth.
- For stubborn residue, let the tray soak briefly before scrubbing gently.
If the tray is not labeled dishwasher-safe in the manual, hand wash it to avoid warping or discoloration.
How to dry it fully
Dry the crumb tray thoroughly with a clean towel and allow it to air dry before reinserting. Moisture left on the tray or inside the toaster can cause electrical problems or smoke when the toaster is powered again.
Step 3: Shake out loose crumbs
After the crumb tray is removed and cleaned, use gravity to remove additional debris that remains inside the toaster cavity.
How to turn the toaster safely
- With the toaster unplugged and cooled, hold it over a sink or a garbage can lined with a bag, or place a towel on the counter to catch crumbs.
- Grip the toaster securely and gently turn it upside down and give it one or two controlled shakes to dislodge loose crumbs.
- Tap the sides lightly if needed, but avoid hard knocks that could damage internal parts.
Avoid metal tools
Metal tools such as knives, forks, or screwdrivers can short internal electrical components, damage heating elements, and create a shock or fire hazard. Use nonmetal tools like wooden chopsticks or a soft-bristled brush for interior work.
Protect your counter
Place a towel under the toaster before shaking it to keep crumbs contained. Shake the toaster over a trash bag or can if possible to avoid spreading debris across the counter.
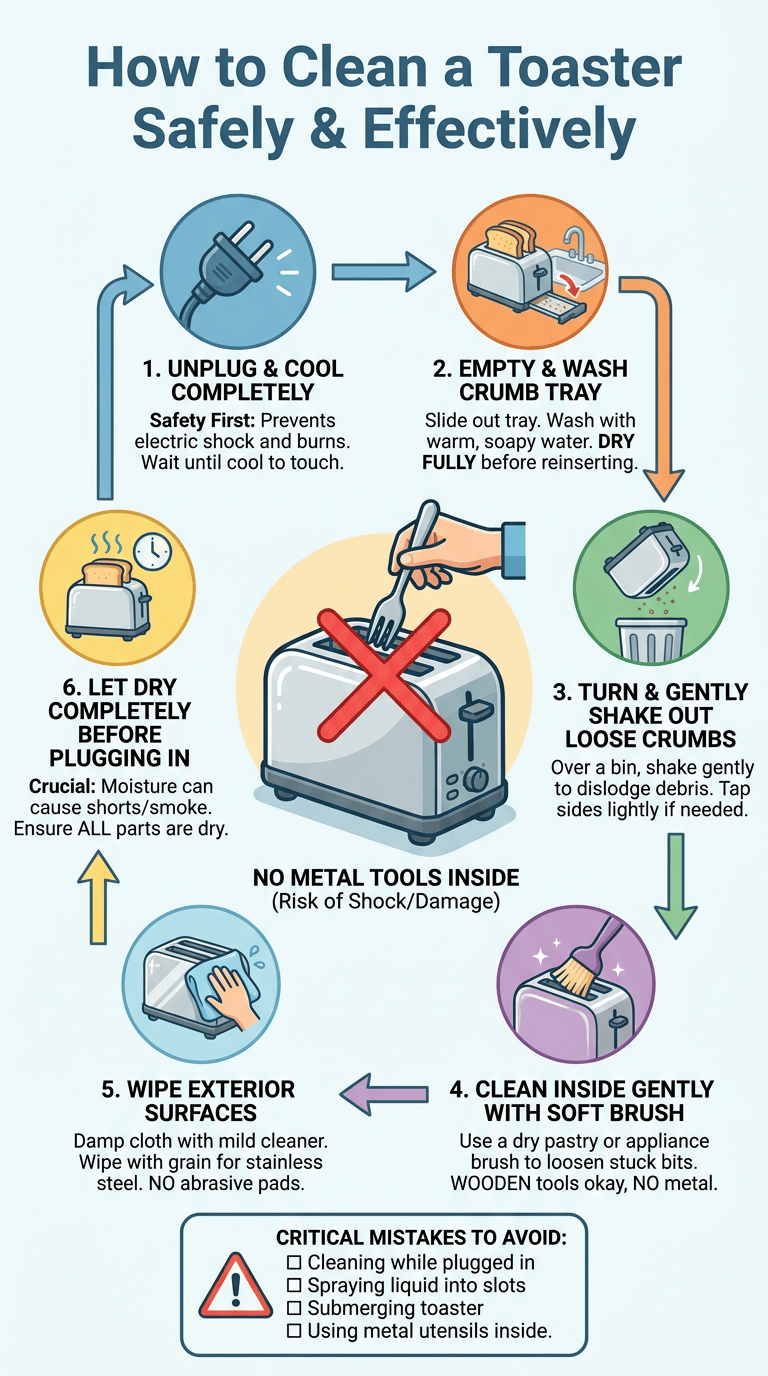
Step 4: Clean the inside gently
Interior cleaning removes stuck crumbs and residue near heating elements without damaging the toaster. Proceed carefully and use appropriate tools.
How to loosen stuck crumbs
- After shaking, use a soft, dry brush to loosen any stubborn bits. A pastry brush or a clean paintbrush works well.
- Use wooden or plastic tools to reach into slots while the toaster is unplugged and cooled.
- A vacuum with a narrow attachment can remove loosened crumbs from slots if the nozzle does not touch the elements. Use brief, gentle suction when possible and keep the nozzle outside the slots.
What brush to use
Choose a brush with soft bristles, such as a pastry brush, bottle brush with soft bristles, or a dedicated appliance brush. Avoid stiff or metal bristles that could abrade elements or protective coatings.
What not to put inside
- Do not put water, sprays, or liquid cleaners into the slots.
- Do not insert metal objects into the toaster interior.
- Do not immerse the toaster body in water or run it under a faucet.
If you find melted cheese, wax, or other food stuck to elements, let the toaster cool and attempt to remove the residue with a wooden tool and gentle brushing. For extensive melted deposits or damage, stop and consult the manufacturer or a qualified technician rather than attempting aggressive repairs yourself.
Step 5: Wipe the outside
Cleaning the exterior keeps the toaster hygienic and maintains its appearance. Different finishes need slightly different care.
Plastic surfaces
- Use a soft cloth dampened with warm, soapy water to wipe plastic surfaces.
- Rinse the cloth and wipe again to remove soap residue.
- Dry with a clean towel to prevent streaks.
Avoid abrasive pads that can scratch plastic or remove color. For stubborn grease, a small amount of mild dish soap on a damp cloth usually works well.
Stainless steel surfaces
Wipe stainless steel surfaces with a soft cloth dampened with warm, soapy water, following the grain when possible. For fingerprints and light smudges, a small amount of white vinegar on a microfiber cloth can help remove marks without harsh chemicals. For guidance on choosing cleaning products with safer ingredient profiles, see EPA Safer Choice guidance.
Removing fingerprints
Use a microfiber cloth and a mild cleaner suitable for the surface. For stainless steel, wipe along the grain and buff with a dry cloth to restore shine. For painted or plastic surfaces, a damp cloth followed by a dry cotton towel usually removes fingerprints effectively.
Step 6: Let everything dry before plugging in
Drying is a crucial safety step. Moisture in or on electrical components can cause short circuits, sparks, or smoke when the appliance is used. If the toaster has been exposed to significant moisture or immersion, do not use it until it has been inspected or repaired by a professional.
For general household cleaning and disinfecting safety guidance, see the CDC’s cleaning and disinfecting information.
CDC cleaning and disinfecting guidance
Check the crumb tray
Make sure the crumb tray is completely dry and free of soap residue before sliding it back. Hold it up to the light if needed to check for wet spots.
When it is safe to use again
Only plug the toaster back in after all parts, including the interior if it was accidentally damp, have dried completely. If the toaster emits any unusual burning smell after first use post-cleaning, unplug it and inspect again.
Common mistakes to avoid
Cleaning while plugged in
Never clean a toaster while it is plugged in. This includes vacuuming inside the slots with the appliance connected to power. Always unplug first.
Using metal tools inside
Do not use knives or other metal utensils to scrape inside the toaster. Metal tools can puncture insulation, bend elements, or cause a short circuit.
Spraying cleaner into slots
Do not spray aerosol or liquid cleaners into the slots. Sprays can travel to internal components and leave residues that smoke or cause electrical problems when heated.
Forgetting the crumb tray
Cleaning the crumb tray regularly is easy but often neglected. A neglected tray allows buildup that can cause odors, smoke, or an increased fire risk if crumbs continue to char under repeated use.
Maintenance checklist
After heavy use
- Unplug and cool the toaster.
- Empty and clean the crumb tray.
- Shake out loose crumbs over a trash receptacle.
- Wipe the exterior with a damp cloth if there are spills or grease.
Weekly
- Wipe down the exterior and control knobs.
- Brush the slots gently to remove visible crumbs.
- Empty and wash the crumb tray if used daily.
Monthly
- Remove and deep-clean the crumb tray.
- Give the interior a careful brush and shake-out session.
- Inspect the power cord for damage and the casing for dents or warping. If you find damage, stop using the toaster and contact the manufacturer or a repair service.
Frequently asked questions
How often should I clean my toaster?
For light home use, empty the crumb tray weekly and give the interior a gentle shake and brush monthly. If you use the toaster daily or make crumbier foods frequently, empty the tray and wipe the exterior more often. Adjust frequency based on visible residue and odors.
Can I wash the inside of a toaster?
Do not wash the inside of the toaster with water. Remove the crumb tray and wash that in a sink if it is removable. For the toaster body and slots, use dry brushing, gentle scraping with wooden tools, or limited damp wiping on areas that are not near electrical components. Do not submerge the toaster or run water into the slots.
Why does my toaster smell burnt?
A burnt smell usually means crumbs or residue are charring when the toaster is used. Cleaning the crumb tray, shaking out debris, and brushing the interior typically resolves the smell. If the smell continues after cleaning, unplug the appliance and have it inspected.
Can I use water to clean a toaster?
Do not use water inside the toaster or spray water into the slots. Use water only on removable parts that the manufacturer indicates can be washed, such as a removable crumb tray, and ensure those parts are fully dry before reinserting. If a spill occurs inside the toaster, unplug it and consult the manual. If significant moisture entered the appliance, do not use it until it has dried thoroughly or been serviced.
How do I clean a stainless steel toaster?
Wipe stainless steel surfaces with a soft cloth and warm, soapy water, then dry and buff with a clean cloth. For fingerprints and smudges, a small amount of white vinegar on a microfiber cloth often removes marks without harsh chemicals. Avoid abrasive scrubbers that can scratch the finish. Follow manufacturer care instructions if provided.
Final thoughts
Cleaning a toaster safely is a matter of routine, common sense, and a few simple tools. Unplug the appliance, keep moisture away from heating elements and electrical components, avoid metal tools inside the slots, and remove crumbs regularly. When in doubt, stop and consult the manufacturer or a repair professional. For help choosing less hazardous cleaning products, see EPA Safer Choice guidance, and for household cleaner exposure and safety information consult Poison Control.
Poison Control guidance on household cleaner exposures

Ethan Carter is the Founder & Editor of HomeCleanSecrets. Based in the United States, he has 5 years of experience creating practical home cleaning, laundry care, stain removal, decluttering, and home organization content. His goal is to help everyday households clean smarter and build simple routines that are easier to maintain.
Read more about Ethan Carter on his author page: https://homecleansecrets.com/ethan-carter/