
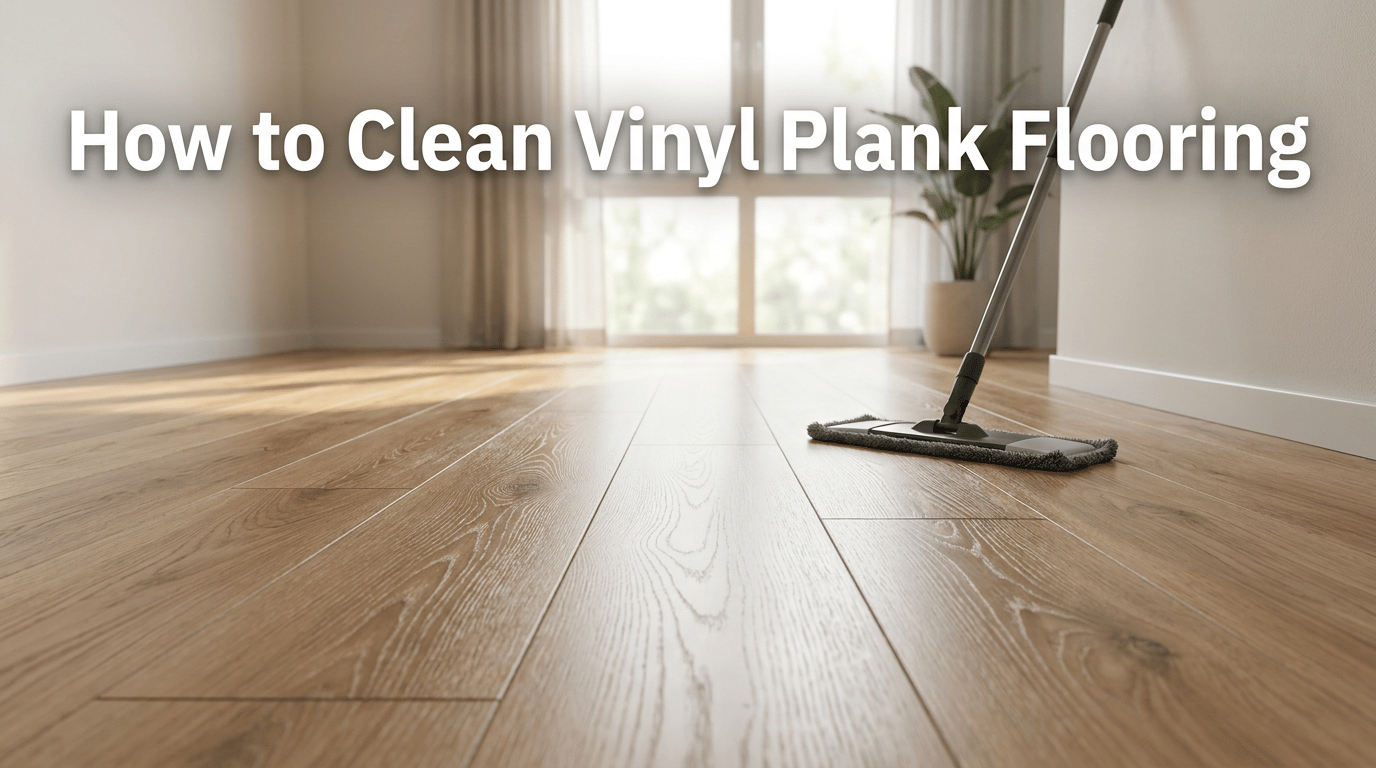
If you want a reliable how to clean vinyl plank flooring, the order matters as much as the cleaner. Most floor problems begin when dust, kitchen film, scuffs, sticky spots, and grit are mixed together, pushed across the room, or soaked into a material that needs a lighter touch. This guide gives you a practical routine for vinyl plank wear layer, seams, and edges without turning every spill into a deep-cleaning project.
The safest approach is simple: vacuum soft debris, damp mop with minimal water, rinse residue, and dry wet spots. That sequence helps cleaning products work on the actual mess instead of on loose grit, old soap, or wet soil. It also gives you natural checkpoints, so you can stop before a surface becomes too wet or too aggressively scrubbed.
Use the advice below as a calm decision tree. If the surface is hard, control moisture and protect seams or finishes. If it is soft, remove dry soil first and avoid driving liquid into backing. CDC household cleaning guidance
For a related walkthrough, see our guide to how to clean laminate floors without streaks.
For a related walkthrough, see our guide to how to clean tile floors.
For a related walkthrough, see our guide to floor and carpet cleaning guide.
Quick Answer: The Best Way to Clean Vinyl Plank Flooring
The best way to handle how to clean vinyl plank flooring is to follow a steady order: vacuum soft debris, damp mop with minimal water, rinse residue, and dry wet spots. That order keeps dust, kitchen film, scuffs, sticky spots, and grit from spreading and helps you avoid scratches, dull film, and moisture pushed into seams. Start with the gentlest method that matches the material, then only repeat a step after the area has dried enough to judge the result.
The basic method
For the basic method, keep the goal narrow: solve the visible problem while protecting vinyl plank wear layer, seams, and edges. A vinyl plank floor owner does not need a stronger product for every job. The safer move is to remove loose soil, use a measured amount of cleaner, and stop once the surface looks clean and feels residue-free.
Vacuum or sweep first
Vacuum or sweep first matters because dry particles act like tiny abrasives and can turn into muddy residue once water is added. Use slow passes, reach corners and edges, and empty or clean the tool when pickup drops.
Mop with a damp microfiber mop
Mop with a damp microfiber mop protects the material after cleaning. Blot or wipe away extra moisture, increase airflow, and keep furniture, rugs, and foot traffic off the area until it is fully dry.
Use vinyl-safe cleaner
Use vinyl-safe cleaner changes the method because each material reacts differently to water, heat, soap, and scrubbing. Check labels or manufacturer guidance, then choose the least aggressive option that can still remove dust, kitchen film, scuffs, sticky spots, and grit.
Dry wet spots
Dry wet spots protects the material after cleaning. Blot or wipe away extra moisture, increase airflow, and keep furniture, rugs, and foot traffic off the area until it is fully dry.
What to avoid
The biggest mistakes with how to clean vinyl plank flooring come from rushing, using one cleaner on every surface, and adding too much water. When a method is not working, stop and reassess instead of scrubbing harder. Gentle repetition, good rinsing, and full drying usually protect the finish or fibers better than force.
Steam mops unless approved
Steam mops unless approved is a small detail, but it affects the final result. Keep the area controlled, use clean tools, and pause if you see color transfer, swelling, spreading, or a slippery feel.
Excess water
Excess water is a small detail, but it affects the final result. Keep the area controlled, use clean tools, and pause if you see color transfer, swelling, spreading, or a slippery feel.
Abrasive scrubbers
Abrasive scrubbers calls for control rather than pressure. A soft or nylon brush can loosen buildup, but rough pads, metal bristles, and hard rubbing can damage fibers, grout, or finishes.
Waxy cleaners
Waxy cleaners is a small detail, but it affects the final result. Keep the area controlled, use clean tools, and pause if you see color transfer, swelling, spreading, or a slippery feel.
Why vinyl plank needs care
For why vinyl plank needs care, keep the goal narrow: solve the visible problem while protecting vinyl plank wear layer, seams, and edges. A vinyl plank floor owner does not need a stronger product for every job. The safer move is to remove loose soil, use a measured amount of cleaner, and stop once the surface looks clean and feels residue-free.
Seams and edges
Seams and edges is a small detail, but it affects the final result. Keep the area controlled, use clean tools, and pause if you see color transfer, swelling, spreading, or a slippery feel.
Wear layer
Wear layer is a small detail, but it affects the final result. Keep the area controlled, use clean tools, and pause if you see color transfer, swelling, spreading, or a slippery feel.
Residue buildup
Residue buildup is usually a residue problem. Use less cleaner next time, rinse lightly when the label allows it, and dry with a clean cloth so soil does not cling to leftover product.
Supplies You Need
Keep the kit simple and controlled. A vacuum or broom removes grit, microfiber holds dust and moisture, white cloths show stain transfer, and a soft brush gives targeted agitation without rough scraping. Choose cleaners by label and material, not by strength, because extra product often leaves residue that attracts dirt faster. EPA indoor air quality guidance
Basic tools
Keep the kit simple and controlled. A vacuum or broom removes grit, microfiber holds dust and moisture, white cloths show stain transfer, and a soft brush gives targeted agitation without rough scraping. Choose cleaners by label and material, not by strength, because extra product often leaves residue that attracts dirt faster.
Vacuum without beater damage
Vacuum without beater damage matters because dry particles act like tiny abrasives and can turn into muddy residue once water is added. Use slow passes, reach corners and edges, and empty or clean the tool when pickup drops.
Soft broom
Soft broom is a small detail, but it affects the final result. Keep the area controlled, use clean tools, and pause if you see color transfer, swelling, spreading, or a slippery feel.
Microfiber mop
Microfiber mop is a small detail, but it affects the final result. Keep the area controlled, use clean tools, and pause if you see color transfer, swelling, spreading, or a slippery feel.
Dry towel
Dry towel protects the material after cleaning. Blot or wipe away extra moisture, increase airflow, and keep furniture, rugs, and foot traffic off the area until it is fully dry.
Cleaner options
Keep the kit simple and controlled. A vacuum or broom removes grit, microfiber holds dust and moisture, white cloths show stain transfer, and a soft brush gives targeted agitation without rough scraping. Choose cleaners by label and material, not by strength, because extra product often leaves residue that attracts dirt faster.
Vinyl-safe floor cleaner
Vinyl-safe floor cleaner changes the method because each material reacts differently to water, heat, soap, and scrubbing. Check labels or manufacturer guidance, then choose the least aggressive option that can still remove dust, kitchen film, scuffs, sticky spots, and grit.
Mild dish soap in small amount
Mild dish soap in small amount is a small detail, but it affects the final result. Keep the area controlled, use clean tools, and pause if you see color transfer, swelling, spreading, or a slippery feel.
Plain water for light soil
Plain water for light soil is a small detail, but it affects the final result. Keep the area controlled, use clean tools, and pause if you see color transfer, swelling, spreading, or a slippery feel.
Optional tools
Keep the kit simple and controlled. A vacuum or broom removes grit, microfiber holds dust and moisture, white cloths show stain transfer, and a soft brush gives targeted agitation without rough scraping. Choose cleaners by label and material, not by strength, because extra product often leaves residue that attracts dirt faster.
Soft brush for texture
Soft brush for texture calls for control rather than pressure. A soft or nylon brush can loosen buildup, but rough pads, metal bristles, and hard rubbing can damage fibers, grout, or finishes.
Felt pads for furniture
Felt pads for furniture is a small detail, but it affects the final result. Keep the area controlled, use clean tools, and pause if you see color transfer, swelling, spreading, or a slippery feel.
Entry mats
Entry mats is a small detail, but it affects the final result. Keep the area controlled, use clean tools, and pause if you see color transfer, swelling, spreading, or a slippery feel.
Step 1: Remove Dirt Without Scratching

This step keeps how to clean vinyl plank flooring practical instead of messy. Work in a small area, use only enough moisture or cleaner to move the soil, and check your cloth, mop pad, or vacuum cup often. If the tool is already dirty, continuing usually spreads residue rather than removing it.
Vacuum or sweep daily-use areas
For vacuum or sweep daily-use areas, keep the goal narrow: solve the visible problem while protecting vinyl plank wear layer, seams, and edges. A vinyl plank floor owner does not need a stronger product for every job. The safer move is to remove loose soil, use a measured amount of cleaner, and stop once the surface looks clean and feels residue-free.
Entryways
Entryways is a small detail, but it affects the final result. Keep the area controlled, use clean tools, and pause if you see color transfer, swelling, spreading, or a slippery feel.
Kitchen paths
Kitchen paths is a small detail, but it affects the final result. Keep the area controlled, use clean tools, and pause if you see color transfer, swelling, spreading, or a slippery feel.
Under dining chairs
Under dining chairs is a small detail, but it affects the final result. Keep the area controlled, use clean tools, and pause if you see color transfer, swelling, spreading, or a slippery feel.
Avoid dragging grit
The biggest mistakes with how to clean vinyl plank flooring come from rushing, using one cleaner on every surface, and adding too much water. When a method is not working, stop and reassess instead of scrubbing harder. Gentle repetition, good rinsing, and full drying usually protect the finish or fibers better than force.
Grit scratches the wear layer
Grit scratches the wear layer matters because dry particles act like tiny abrasives and can turn into muddy residue once water is added. Use slow passes, reach corners and edges, and empty or clean the tool when pickup drops.
Lift furniture when possible
Lift furniture when possible is a small detail, but it affects the final result. Keep the area controlled, use clean tools, and pause if you see color transfer, swelling, spreading, or a slippery feel.
Clean edges and seams
For clean edges and seams, keep the goal narrow: solve the visible problem while protecting vinyl plank wear layer, seams, and edges. A vinyl plank floor owner does not need a stronger product for every job. The safer move is to remove loose soil, use a measured amount of cleaner, and stop once the surface looks clean and feels residue-free.
Use soft brush attachment
Use soft brush attachment calls for control rather than pressure. A soft or nylon brush can loosen buildup, but rough pads, metal bristles, and hard rubbing can damage fibers, grout, or finishes.
Avoid forcing water into seams
The biggest mistakes with how to clean vinyl plank flooring come from rushing, using one cleaner on every surface, and adding too much water. When a method is not working, stop and reassess instead of scrubbing harder. Gentle repetition, good rinsing, and full drying usually protect the finish or fibers better than force.
Step 2: Mop with Minimal Water

This step keeps how to clean vinyl plank flooring practical instead of messy. Work in a small area, use only enough moisture or cleaner to move the soil, and check your cloth, mop pad, or vacuum cup often. If the tool is already dirty, continuing usually spreads residue rather than removing it.
Use a damp mop
For use a damp mop, keep the goal narrow: solve the visible problem while protecting vinyl plank wear layer, seams, and edges. A vinyl plank floor owner does not need a stronger product for every job. The safer move is to remove loose soil, use a measured amount of cleaner, and stop once the surface looks clean and feels residue-free.
Wring thoroughly
Wring thoroughly is a small detail, but it affects the final result. Keep the area controlled, use clean tools, and pause if you see color transfer, swelling, spreading, or a slippery feel.
Work in sections
Work in sections is a small detail, but it affects the final result. Keep the area controlled, use clean tools, and pause if you see color transfer, swelling, spreading, or a slippery feel.
Choose the right cleaner
For choose the right cleaner, keep the goal narrow: solve the visible problem while protecting vinyl plank wear layer, seams, and edges. A vinyl plank floor owner does not need a stronger.
Vinyl-safe label
Avoid wax and polish unless approved
Rinse if residue remains
Clean water pass
Clean water pass is a small detail, but it affects the final result. Keep the area controlled, use clean tools, and pause if you see color transfer, swelling, spreading, or a slippery feel.
Dry after rinsing
Dry after rinsing protects the material after cleaning. Blot or wipe away extra moisture, increase airflow, and keep furniture, rugs, and foot traffic off the area until it is fully dry.
Step 3: Dry and Inspect the Floor

Dry wet areas
Around seams
Around seams is a small detail, but it affects the final result. Keep the area controlled, use clean tools, and pause if you see color transfer, swelling, spreading, or a slippery feel.
Near appliances
Near appliances is a small detail, but it affects the final result. Keep the area controlled, use clean tools, and pause if you see color transfer, swelling, spreading, or a slippery feel.
Entryways
Entryways is a small detail, but it affects the final result. Keep the area controlled, use clean tools, and pause if you see color transfer, swelling, spreading, or a slippery feel.
Check for streaks
Too much cleaner
Too much cleaner is a small detail, but it affects the final result. Keep the area controlled, use clean tools, and pause if you see color transfer, swelling, spreading, or a slippery feel.
Dirty mop pad
Dirty mop pad is a small detail, but it affects the final result. Keep the area controlled, use clean tools, and pause if you see color transfer, swelling, spreading, or a slippery feel.
Check for damage
Lifted edges
Lifted edges is a small detail, but it affects the final result. Keep the area controlled, use clean tools, and pause if you see color transfer, swelling, spreading, or a slippery feel.
Scratches
Scratches is a small detail, but it affects the final result. Keep the area controlled, use clean tools, and pause if you see color transfer, swelling, spreading, or a slippery feel.
Loose planks
Loose planks is a small detail, but it affects the final result. Keep the area controlled, use clean tools, and pause if you see color transfer, swelling, spreading, or a slippery feel.
How to Remove Common Vinyl Plank Messes
Sticky spills
Blot first
Blot first is a small detail, but it affects the final result. Keep the area controlled, use clean tools, and pause if you see color transfer, swelling, spreading, or a slippery feel.
Use mild cleaner
Use mild cleaner is a small detail, but it affects the final result. Keep the area controlled, use clean tools, and pause if you see color transfer, swelling, spreading, or a slippery feel.
Scuff marks
Soft cloth method
Soft cloth method is a small detail, but it affects the final result. Keep the area controlled, use clean tools, and pause if you see color transfer, swelling, spreading, or a slippery feel.
Avoid harsh abrasives
Pet accidents
Blot immediately
Blot immediately is a small detail, but it affects the final result. Keep the area controlled, use clean tools, and pause if you see color transfer, swelling, spreading, or a slippery feel.
Clean and dry seams
Clean and dry seams protects the material after cleaning. Blot or wipe away extra moisture, increase airflow, and keep furniture, rugs, and foot traffic off the area until it is fully dry.
Grease or kitchen film
Use small amount of degreasing cleaner
Rinse residue
Rinse residue is usually a residue problem. Use less cleaner next time, rinse lightly when the label allows it, and dry with a clean cloth so soil does not cling to leftover product.
How to Keep Vinyl Plank Floors Clean Longer
Use entry mats
Trap grit
Keep water off floors
Keep water off floors is a small detail, but it affects the final result. Keep the area controlled, use clean tools, and pause if you see color transfer, swelling, spreading, or a slippery feel.
Protect furniture
Felt pads
Felt pads is a small detail, but it affects the final result. Keep the area controlled, use clean tools, and pause if you see color transfer, swelling, spreading, or a slippery feel.
Lift instead of drag
Lift instead of drag is a small detail, but it affects the final result. Keep the area controlled, use clean tools, and pause if you see color transfer, swelling, spreading, or a slippery feel.
Clean spills fast
Protect seams
Protect seams is a small detail, but it affects the final result. Keep the area controlled, use clean tools, and pause if you see color transfer, swelling, spreading, or a slippery feel.
Reduce sticky residue
Reduce sticky residue is usually a residue problem. Use less cleaner next time, rinse lightly when the label allows it, and dry with a clean cloth so soil does not cling to leftover product.
Vinyl Plank Cleaning Mistakes to Avoid
Soaking the floor
Water near seams
Water near seams is a small detail, but it affects the final result. Keep the area controlled, use clean tools, and pause if you see color transfer, swelling, spreading, or a slippery feel.
Edge lifting risk
Edge lifting risk is a small detail, but it affects the final result. Keep the area controlled, use clean tools, and pause if you see color transfer, swelling, spreading, or a slippery feel.
Using steam
Heat and moisture risk
Heat and moisture risk protects the material after cleaning. Blot or wipe away extra moisture, increase airflow, and keep furniture, rugs, and foot traffic off the area until it is fully dry.
Follow manufacturer guidance
Follow manufacturer guidance is a small detail, but it affects the final result. Keep the area controlled, use clean tools, and pause if you see color transfer, swelling, spreading, or a slippery feel.
Using waxy products
Film buildup
Film buildup is usually a residue problem. Use less cleaner next time, rinse lightly when the label allows it, and dry with a clean cloth so soil does not cling to leftover product.
Dull appearance
Dull appearance is a small detail, but it affects the final result. Keep the area controlled, use clean tools, and pause if you see color transfer, swelling, spreading, or a slippery feel.
Scrubbing with rough pads
Wear layer scratches
Wear layer scratches is a small detail, but it affects the final result. Keep the area controlled, use clean tools, and pause if you see color transfer, swelling, spreading, or a slippery feel.
Permanent dull spots

Frequently Asked Questions
What is the best cleaner for vinyl plank flooring?
The best cleaner is the mildest label-approved option for the material. A pH-neutral floor cleaner, vinyl-safe or laminate-safe product, or carpet-safe spot cleaner is usually a safer starting point than a strong all-purpose product.
Can I use vinegar on vinyl plank floors?
Use vinegar only if the floor or carpet manufacturer allows it. Avoid acidic cleaners on natural stone and be cautious on surfaces where acid, water, or odor can create a bigger problem.
Can I steam mop vinyl plank flooring?
Steam only when the manufacturer clearly approves it. Heat and moisture can harm some seams, backing, adhesives, finishes, and stain types.
Why is my vinyl plank floor sticky after mopping?
Use less cleaner, change dirty water or pads sooner, rinse lightly if the material allows it, and dry the surface before residue has time to settle.
How often should I mop vinyl plank flooring?
Clean visible traffic areas weekly, spot clean fresh messes right away, and schedule a more detailed pass monthly or when residue, odor, or stains return quickly.
How do I make vinyl plank floors shine without wax?
Final Thoughts
Clean gently, dry fully, and repeat the routine.

Ethan Carter is the Founder & Editor of HomeCleanSecrets. Based in the United States, he has 5 years of experience creating practical home cleaning, laundry care, stain removal, decluttering, and home organization content. His goal is to help everyday households clean smarter and build simple routines that are easier to maintain.
Read more about Ethan Carter on his author page: https://homecleansecrets.com/ethan-carter/