
If you need to learn how to declutter a garage, start with a simple goal: reduce the amount of stuff before you worry about perfect storage. A garage usually becomes crowded because it holds delayed decisions. Broken tools wait for repairs, old paint waits for one more touch-up, sports gear waits for the next season, and boxes from past projects wait because nobody is sure what is inside.
The cleanest garage storage system will not work if the garage still contains too much. The first job is to decide what stays, what leaves, what belongs somewhere else, and what needs careful disposal. When the volume drops, the remaining organizing choices become easier, safer, and less expensive.
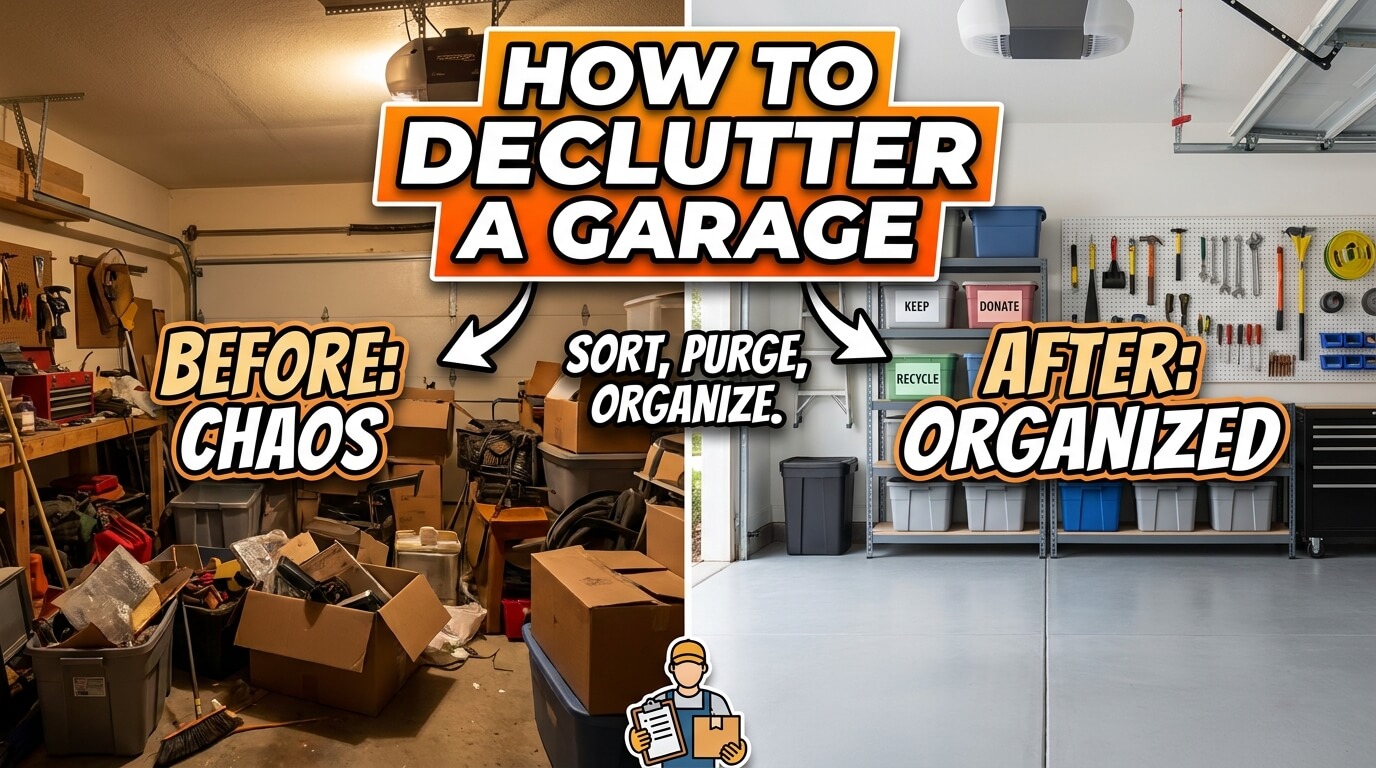
Quick Answer: The Garage Decluttering Method
Place this category within a broader garage organization and storage plan so the surrounding zones work together.


The best garage decluttering method is to open walking space first, sort items by decision type, remove obvious exits quickly, handle risky products separately, and only then prepare the kept items for future storage. Decluttering is not the same as arranging shelves. The point is to reduce volume and risk before you decide where everything should live.
Start with safety and walking space
Before opening boxes, clear a path from the main garage door to the house door, exterior door, breaker panel, water heater, trash area, freezer, or any appliance you need to reach. Move tripping hazards out of the path, flatten loose cardboard, stand long tools upright in one temporary corner, and remove trash that is already obvious.
A good test is whether you can carry a laundry basket or storage bin through the garage without turning sideways or stepping over piles. If the answer is no, do not start detailed sorting yet. Open the path first so every later decision is safer and less frustrating.
Sort by decision type, not by perfect storage category
At the decluttering stage, do not worry about the final shelf plan. Use simple decision zones: keep, relocate, donate, sell, recycle, trash, and needs careful disposal. A box of mixed items can be split quickly when you ask what decision each item needs, not what perfect category it belongs to.
Remove obvious exits before organizing kept items
Old packaging, dry cardboard scraps, broken plastic bins, unusable sports balls, empty containers, and duplicate low-value items should leave early. The faster those exits leave the work area, the less visual noise you have while making harder decisions.
Do not turn the first pass into a memory project. If an item is clearly trash, set it aside. If it clearly belongs inside the house, put it in the relocate zone. If it is clearly safe to donate and in usable condition, put it in the donation zone. Save difficult items for a later pass when the garage is calmer.
Why Garage Decluttering Feels Hard
A garage is different from a closet or kitchen drawer because it holds many unrelated categories at once. It can contain tools, chemicals, paper keepsakes, holiday bins, bikes, plant supplies, automotive products, sports gear, pet supplies, and half-finished repairs. That mix creates decision fatigue fast.
Garages collect delayed decisions
Most garage clutter is not random. It is a stack of decisions nobody wanted to make at the time. A broken chair was saved because it might be repaired. Extra tile was saved because it might match a future patch. A half-used cleaner was saved because throwing it away felt wasteful. Over time, the garage becomes a holding area for unfinished choices.
Sentimental and seasonal items hide among practical items
Holiday decorations, childhood sports gear, family camping supplies, old school projects, and inherited tools can make the garage feel emotionally loaded. The problem gets harder when sentimental items sit in the same bins as damaged cords, dusty tarps, and unknown hardware.
Hazardous or unknown products slow the process
Many garages contain products that should not be handled like normal trash. Paint, solvents, pesticides, fuels, pool chemicals, batteries, aerosols, and unmarked liquids need a more careful pass. If a label is missing, leaking, swollen, rusted, or unreadable, treat the item as questionable until you check local guidance.
Keep these products upright, closed, away from children and pets, and out of mixed donation boxes. The EPA household hazardous waste guidance explains why common home products may need special handling instead of regular trash disposal.
Set Up a Decluttering Station

A garage cleanout goes faster when every item has a temporary destination. Your station does not have to be pretty. It needs to be clear enough that tired people can still make the same decisions after two hours of sorting.
Keep, relocate, donate, sell, recycle, and disposal zones
Create large, visible zones before you open boxes. Use painter’s tape, cardboard signs, laundry baskets, tarps, or empty bins. The exact setup depends on space, but the decisions should be easy to see.
- Keep: Useful garage items that still support current work, hobbies, maintenance, or household routines.
- Relocate: Items that belong in the house, shed, car, laundry area, attic, or another room.
- Donate: Clean, safe, working items another person could use now.
- Sell: Higher-value items you will list within a set deadline.
- Recycle: Materials your local program accepts, such as certain cardboard, metal, or containers.
- Careful disposal: Chemicals, batteries, fuels, paint products, pesticides, and unknown items that need label checks or local rules.
Keep the sell zone small. If you create a large sell pile with no deadline, it often becomes a second clutter pile. Choose a date for listing, pickup, or moving the items to donation.
Gloves, masks when dusty, boxes, labels, and trash bags
Gather basic supplies before you begin: work gloves, a marker, painter’s tape, heavy trash bags, recycling containers, donation boxes, a broom, a dustpan, and a folding table if you need to sort small parts. If the garage is very dusty, use a well-fitting mask while sweeping or opening old boxes, and ventilate the area when possible.
Where to place questionable chemicals or sharp items temporarily
Set up a separate, stable area for sharp tools, blades, broken glass, corroded batteries, old cleaners, paint cans, pest products, fuels, and anything leaking or unknown. Keep that area away from the main walking path and away from children or pets.
Do not toss questionable products into a general trash bag while you are tired. Keep containers upright and closed. If a product has a label, read it before deciding where it goes. If a container is damaged or unlabeled, stop and check local disposal instructions before moving it more than necessary.
Step 1: Clear the Floor and Main Pathways
Use hooks, shelves, and simple return rules to keep the garage floor clear after decluttering.

The floor is the most important place to begin because it controls safety and momentum. When the floor is packed, every task takes longer. You cannot carry boxes easily, inspect shelves, or see what is actually taking up space.
Remove trash and broken packaging first
Start with items that require almost no decision: empty shipping boxes, crumbling cardboard, broken packaging, dried-out tape rolls, torn bags, loose wrappers, and items that are clearly unusable. Flatten boxes as you go so they stop taking up room.
Pull out floor piles by category
Once obvious trash is gone, pull floor piles into broad groups. Tools together. Garden items together. Sports gear together. Seasonal bins together. Household overflow together. Do not open every storage bin yet. First, get the visible floor items into rough groups so you can see what has multiplied.
Keep exits, doors, and vehicle paths open
As you sort, protect the paths you already cleared. Do not let donation boxes block the house door. Do not lean long tools against a garage door track. Do not stack heavy bins where a car door needs to open.
Step 2: Make Fast Decisions by Category
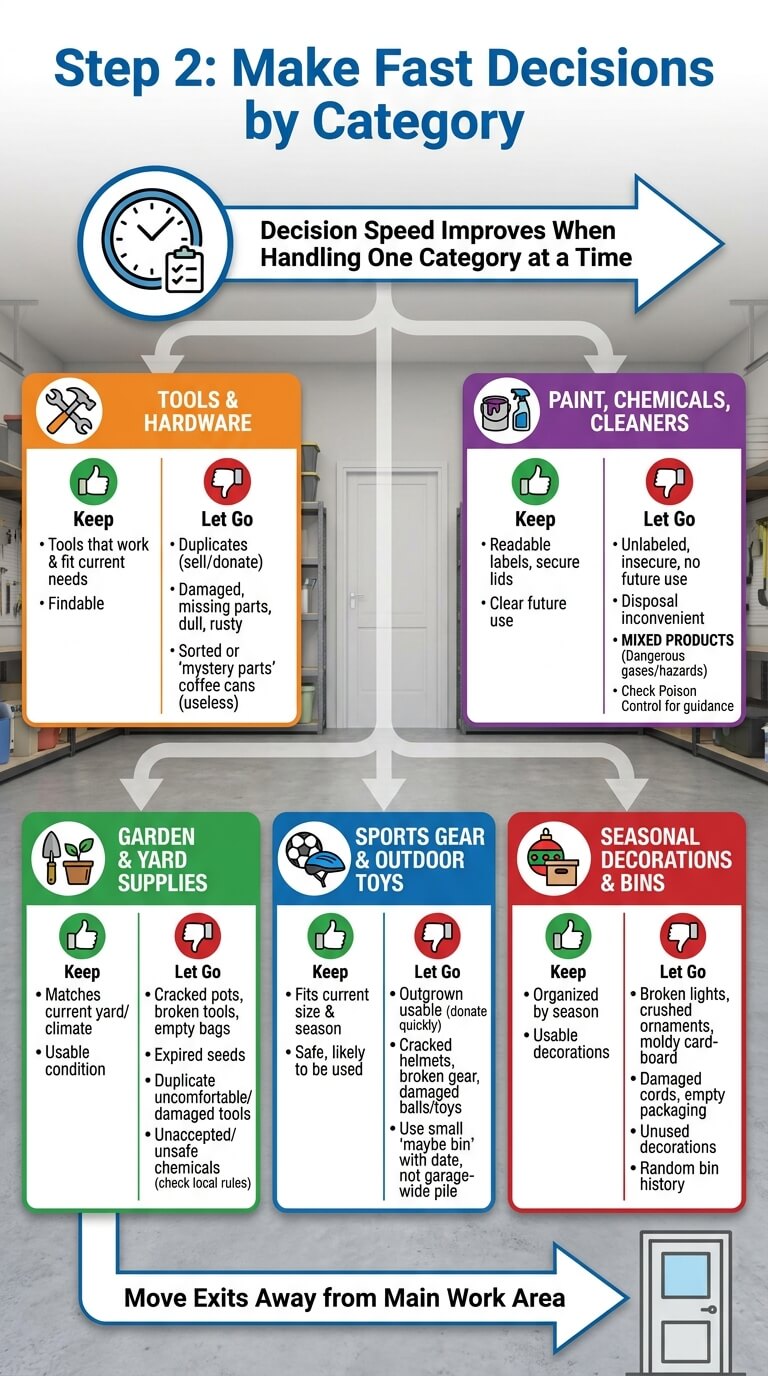
Decision speed improves when you handle one category at a time. You do not need to finish the entire garage before you see progress. Choose one group, make clear decisions, and move exits away from the main work area.
Tools and hardware
Keep tools that work, fit your current home needs, and can be found when needed. Donate or sell duplicates you never use. Set aside damaged power tools, frayed cords, missing chargers, cracked handles, dull blades, and rusty sharp items for repair or disposal decisions.
Small hardware deserves a quick reality check. Keep screws, anchors, nails, and brackets only if they are sorted enough to be useful. A coffee can of mystery parts may feel practical, but it rarely helps when you cannot identify size or purpose.
Paint, chemicals, and cleaners
Because labels, leaks, temperature, and access matter, handle garage cleaning supplies separately in a controlled area.
Put paint, stains, solvents, cleaners, pesticides, fertilizers, fuels, aerosols, pool chemicals, and automotive fluids in their own area. Keep only products with readable labels, secure lids, and a clear future use. Do not keep a product just because disposal feels inconvenient.
Read labels before moving or combining products. Poison Control warns against mixing household cleaners because certain combinations can release dangerous gases or cause other hazards, and its household cleaning product safety advice is a useful reminder when old bottles appear during a garage cleanout.
Garden and yard supplies
Group gloves, pots, hand tools, hoses, plant supports, soil amendments, seeds, fertilizers, pesticides, sprayers, and outdoor repair supplies. Keep what matches your current yard, climate, and maintenance routine. Let go of cracked pots, broken sprayers, empty bags, expired seeds you will not use, and duplicate tools that are uncomfortable or damaged.
Set pesticides, fertilizers, and treated products aside for label checks. Do not place them in donation boxes unless they are accepted, properly labeled, and safe under local rules. Many communities have specific guidance for garden chemicals.
Sports gear and outdoor toys
Sort sports gear by person, sport, and current size. Keep items that fit, are safe, and are likely to be used this season. Donate outgrown but usable gear quickly, before it gets buried again. Throw away cracked helmets, broken protective gear, badly damaged balls, and toys with sharp broken parts.
Use one small maybe bin for uncertain sports gear, not a garage-wide maybe pile. Put a date on the bin. If nobody uses the items by that date, move them out. This keeps outgrown gear from becoming permanent storage.
Seasonal decorations and storage bins
To protect fragile and rarely used items, store seasonal decorations in labeled bins with labels, moisture protection, and a rotation plan.
Open seasonal bins enough to remove broken lights, crushed ornaments, moldy cardboard, damaged extension cords, empty packaging, and decorations your household no longer uses. Keep decorations by season, not by random bin history.
Step 3: Decide What Leaves the Garage
Most progress comes from removing the right items, not from moving clutter to better containers. Be firm with anything broken, unsafe, duplicated, expired, outgrown, or no longer connected to your real life.
Broken or unsafe items
Broken ladders, cracked bins, damaged helmets, frayed extension cords, unstable shelving, bent blades, leaking containers, and splintered handles should not return to normal storage. Some may be repairable, but repair needs a deadline and a place outside the main clutter path.
If an item could hurt someone when used normally, do not donate it. A damaged item is not a gift to the next person. Recycle, repair, or dispose of it according to material and local rules.
Duplicates and abandoned projects
Duplicates are one of the easiest ways to reduce volume. Keep the best version of a tool, bin, broom, cooler, cord, or garden item, and let the weaker versions go. If multiple people in the household need the same item at the same time, keep enough for that real use, not every extra you have collected.
Outgrown sports gear and expired seasonal items
Children’s sports gear, outdoor toys, camping supplies, snow items, pool toys, and seasonal decorations can age out quietly. Check size, condition, and interest. A good rule is to keep what will be used in the next season and release what belongs to a past stage of life.
Seasonal items also expire in less obvious ways. Dried-out craft supplies, brittle plastic decor, damaged cords, leaking snow globes, faded inflatables, and broken yard decorations usually do not deserve another year in a bin.
Products that need local disposal guidance
Some garage items should pause before leaving the property: paint, solvents, pesticides, fuels, used oil, batteries, fluorescent bulbs, pool chemicals, propane cylinders, and unknown liquids. Place them in the careful disposal zone and check product labels, local waste guidance, or household hazardous waste drop-off options.
Never assume donation centers accept chemical products, opened paint, fuels, old batteries, or pesticides. Rules vary by area, and the safest choice is to verify before loading these items into a car.
Step 4: Handle Hazardous or Unknown Items Carefully

Garage decluttering often uncovers products that have been sitting for years. The goal is not to panic. The goal is to slow down, keep containers stable, and avoid risky shortcuts.
Old cleaners, pesticides, paint, fuels, and batteries
Keep products in their original containers when possible. Check labels for storage limits, disposal instructions, temperature warnings, and mixing warnings. If a container is bulging, leaking, rusted through, missing a lid, or too damaged to move safely, step back and check local instructions before handling it further.
Pesticides need extra care because labels are legal directions for use and disposal. The EPA pesticide storage guidance gives practical reminders about original containers, readable labels, and keeping these products away from children and pets.
Why not to mix unknown liquids or pour them down drains
Do not combine half-empty bottles to save space. Do not pour unknown liquids into a drain, onto soil, into a storm drain, or into another container. Products that look similar may not be compatible, and old labels can be missing or misleading.
If you are unsure what a liquid is, keep it upright, isolate it from general clutter, and check local household hazardous waste guidance. If you feel dizzy, notice strong fumes, see an active leak, or suspect a fire risk, stop sorting in that area and get appropriate help.
When to check local rules or product labels
Check before disposing of paint, pesticides, fuel, automotive fluids, batteries, pool chemicals, fluorescent bulbs, and pressurized containers. Some communities offer drop-off days, special collection sites, or retailer take-back options for certain items.
Read labels and manuals before donating or discarding tools with batteries, chargers, blades, or fuel tanks. Remove personal data from electronics if any are stored in the garage. Keep questionable items out of the car until you know how they should be packed for transport.
Step 5: Prepare Kept Items for Organizing
If the surrounding space still lacks structure, take time to organize the garage step by step before fine-tuning this area.
After the purge, the garage will still look imperfect. That is normal. The next step is to group kept items so future storage choices are based on real volume and use, not wishful thinking.
Group by future zone
Place kept items into broad future zones: tools, garden, sports, seasonal, cleaning products, automotive, household overflow, and bulky equipment. This is not final organizing. It is staging. You are preparing the garage so shelves, hooks, cabinets, and bins match what actually remains.
Keep chemical products separated from paper goods, pet items, food-related items, and children’s gear. Keep sharp tools and heavy items away from casual grab zones until they have a safer home.
Measure bulky categories before buying storage
Measure large items before shopping for shelves or bins. Bikes, strollers, coolers, ladders, snow shovels, sports bags, and lawn tools often need wall space or floor clearance more than another plastic tote. Buying storage without measuring is how garages fill with containers that do not solve the problem.
Also check shelf ratings, wall conditions, and garage door movement before planning heavy storage. The Consumer Product Safety Commission’s Anchor It information is a helpful safety reminder when tall shelves, cabinets, or heavy furniture could tip.
Create a short parking-lot list for decisions that need research
Some items need more information before you can decide. Maybe you need to check paint color, confirm whether a charger fits a tool, ask a child about sports gear, or look up disposal rules for a battery. Put these on a written list with a deadline.
Keep the list short. If every uncertain item goes into research mode, the project stalls. Limit the list to items with real value, real risk, or real household disagreement. Everything else should move through keep, donate, recycle, trash, or careful disposal.
Garage Decluttering Checklist
Choose the version that matches your time and energy. A garage that took years to fill does not always need to be fixed in one day. The win is forward movement without creating a larger mess.
30-minute quick pass
- Open the main walking path.
- Remove obvious trash and broken packaging.
- Gather loose cardboard in one place.
- Move dangerous or unknown products to a careful disposal zone.
- Fill one donation box with easy, usable items you no longer need.
- Put inside-the-house items into one relocate basket.
Half-day cleanout
- Clear the floor and mark important paths.
- Sort visible items into broad categories.
- Decision-sort tools, sports gear, garden items, and seasonal bins.
- Load donations into the car if they are safe and accepted.
- Create one careful disposal area for label-dependent products.
- Sweep the newly cleared floor before putting kept groups back temporarily.
Full weekend purge
- Complete the quick floor pass first.
- Open and sort every major bin or shelf section.
- Remove donations, recycling, and trash before the end of each day.
- Check labels on chemicals, paint, pesticides, batteries, and fuels.
- Make a list of items that need local disposal, repair decisions, or family input.
- Group kept items by future zone before buying any new storage.
Common Decluttering Mistakes
Most garage cleanouts fail for predictable reasons. Avoiding these mistakes will save more time than buying another bin or shelf.
Buying bins before reducing volume
Containers can make clutter look controlled while keeping the same problem. Sort and remove first. Then buy storage that fits the items you actually use. A smaller number of well-labeled bins is better than a wall of mystery containers.
Keeping maybe items without a deadline
Maybe items are not always bad. The problem is keeping them forever. Use one maybe box for a specific category, label it with a date, and decide what happens if nobody uses or claims the contents by then.
Hiding hazardous items in mixed boxes
Do not bury old cleaners, batteries, fuels, pesticides, or paint products in mixed bins. Someone may open the box later without knowing what is inside. Keep these items separate, upright, labeled, and handled according to product and local guidance.
Letting floor piles become permanent
Temporary sorting piles should have an end time. Before you stop for the day, move exits out, return kept groups to a stable temporary place, and keep walkways open. A cleanout that leaves piles in every path can become more stressful than the original mess.
FAQ
What should I throw away when decluttering a garage?
Throw away obvious trash, broken packaging, unusable containers, items that are damaged beyond safe repair, and low-value things nobody in the household will use. Do not place chemicals, paint, fuels, batteries, pesticides, or unknown liquids in regular trash until you have checked labels and local disposal rules.
How do I declutter a garage without getting overwhelmed?
Start with a 30-minute floor pass instead of emptying the entire garage. Clear one path, remove obvious trash, create decision zones, and sort one category at a time. Use a short maybe list for decisions that need research, but do not let every item become a maybe.
What garage items should not go in regular trash?
Many areas have specific disposal requirements for paint, solvents, fuels, pesticides, pool chemicals, automotive fluids, batteries, fluorescent bulbs, pressurized containers, and unknown liquids. Local rules vary, so check the label, your community waste program, or a household hazardous waste option before tossing these items.
Should I declutter before organizing?
Yes. Decluttering should come before organizing because it shows what the garage truly needs to hold. Once trash, donations, duplicates, unsafe items, and abandoned projects are gone, it is much easier to choose shelves, hooks, cabinets, and bins that fit the remaining categories.
Final Thoughts
A garage decluttering project works best when you treat it as a decision project, not a storage shopping trip. Clear the floor, sort by what each item needs, remove easy exits, separate risky products, and prepare kept items for a calmer organizing step later.

Ethan Carter is the Founder & Editor of HomeCleanSecrets. Based in the United States, he has 5 years of experience creating practical home cleaning, laundry care, stain removal, decluttering, and home organization content. His goal is to help everyday households clean smarter and build simple routines that are easier to maintain.
Read more about Ethan Carter on his author page: https://homecleansecrets.com/ethan-carter/