
Kids’ art supplies are easier to manage when the storage system reflects three things: how often a material is used, how messy it can be, and who should be able to reach it. Crayons and plain paper may belong in an everyday caddy, while liquid paint, strong adhesives, tiny beads, or specialty tools may need a separate location that an adult controls.
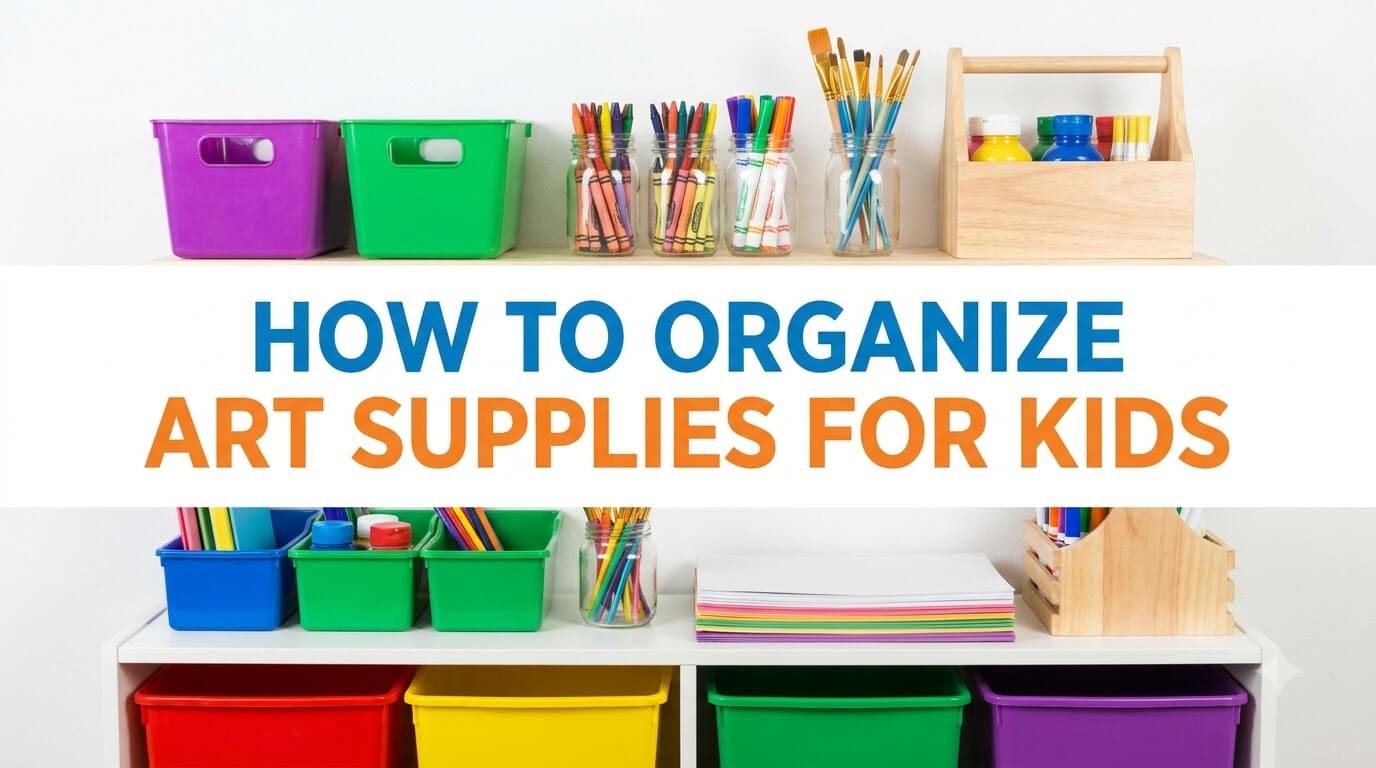
The goal is not to give every marker, sticker, and brush its own compartment. A useful setup makes common supplies easy to find, limits the amount spread across the table, gives unfinished projects a temporary home, and makes cleanup simple enough to repeat after ordinary art time.
Quick Answer: Separate by Use Frequency, Mess Level, and Access
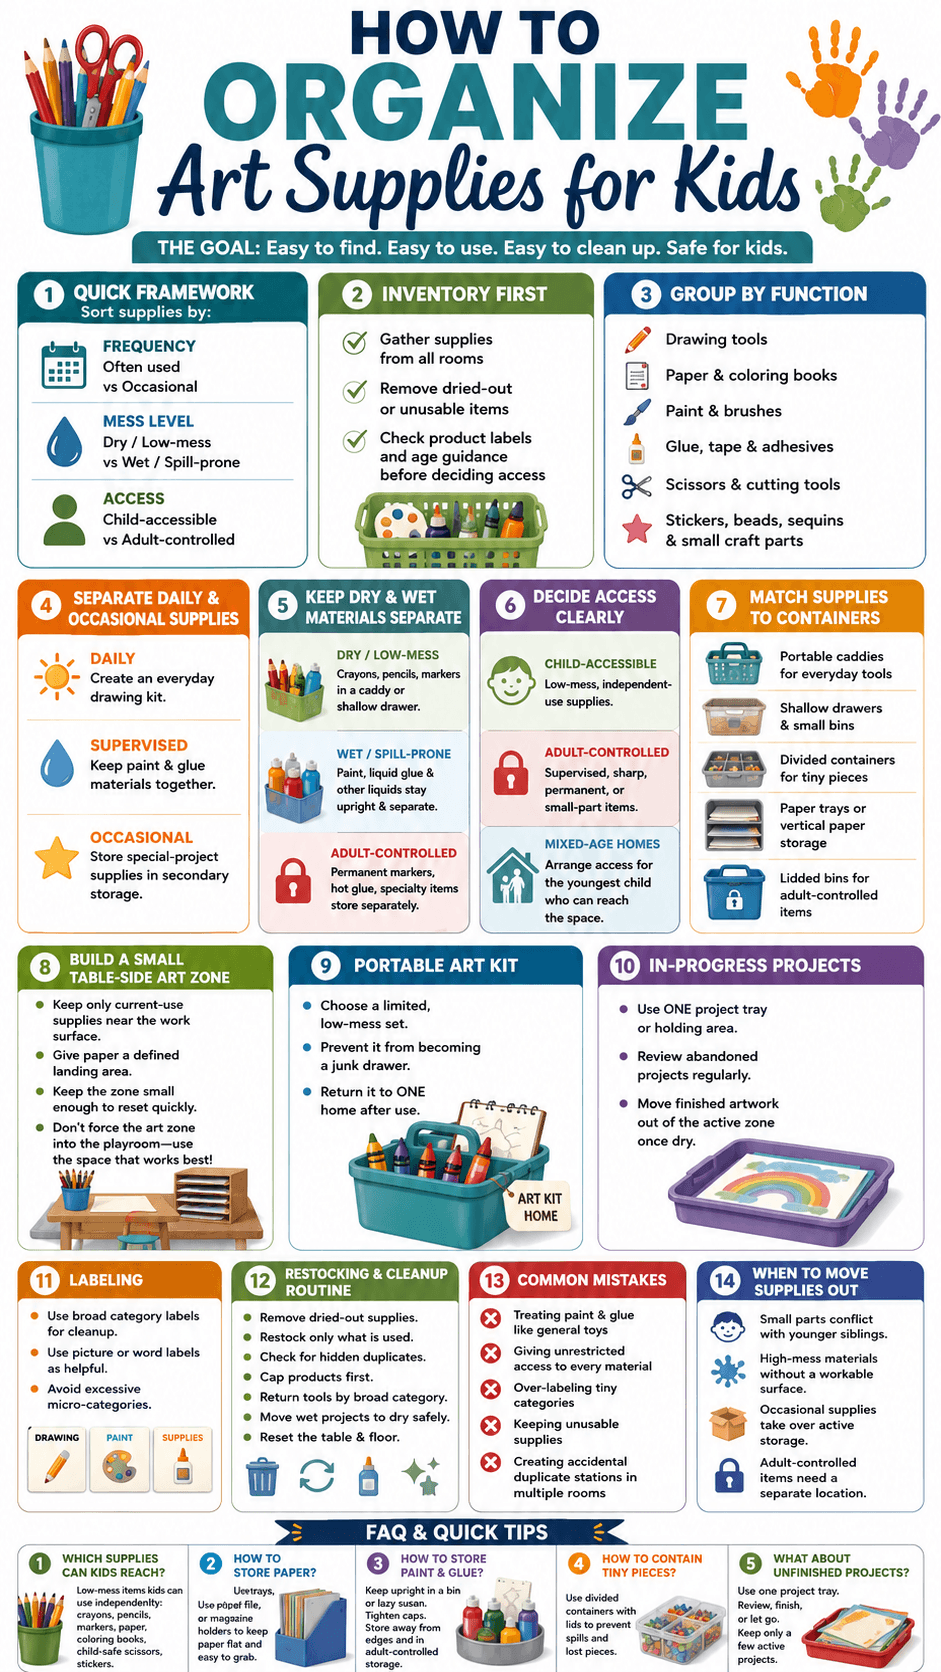
The three-part sorting framework
Sort each item by three practical questions: Is it used often or occasionally? Is it dry and low-mess or wet, permanent, or spill-prone? Can the child use it independently, or does it need adult access? These decisions are more useful for storage than color, brand, or package size.
Why art supplies need different rules from general toys
Art materials include consumables, liquids, sharp or small components, and items that can dry out or spill. Paint bottles, paper, scissors, and loose beads need more deliberate containment than reusable toys. Keep categories broad, but separate materials when access, leakage, size, or product instructions make it necessary. Keep reusable toys in their own category-based toy system instead of mixing them with consumable art materials.
Inventory the Art and Craft Supplies
Gather supplies from drawers, desks, playrooms, and bags
Collect supplies from desk drawers, cabinets, backpacks, playroom shelves, activity bags, and bedroom bins. Put them on one protected surface so you can see the total quantity. If the same category appears in several rooms, choose one primary home before keeping duplicate stations. If art supplies share space with toys, books, or clothing, fit the art zone into the broader kids’ room storage plan rather than treating it as a separate room.
Remove empty, dried-out, or unusable items
Test questionable markers, glue sticks, paint pots, and pens before storing them. Remove empty bottles, dried tools, unwanted scraps, and unusable applicators. Follow the package and local disposal directions for products that need special handling rather than treating every leftover liquid or craft chemical like ordinary trash.
Check labels and age guidance before assigning access
Read the package before deciding whether a material belongs in a child-accessible drawer. The U.S. Consumer Product Safety Commission’s art-material guidance explains that consumer art materials are subject to specific labeling requirements. Keep the original package or transfer any important use and caution information with the product if you move supplies into another container.
Group Supplies by Function
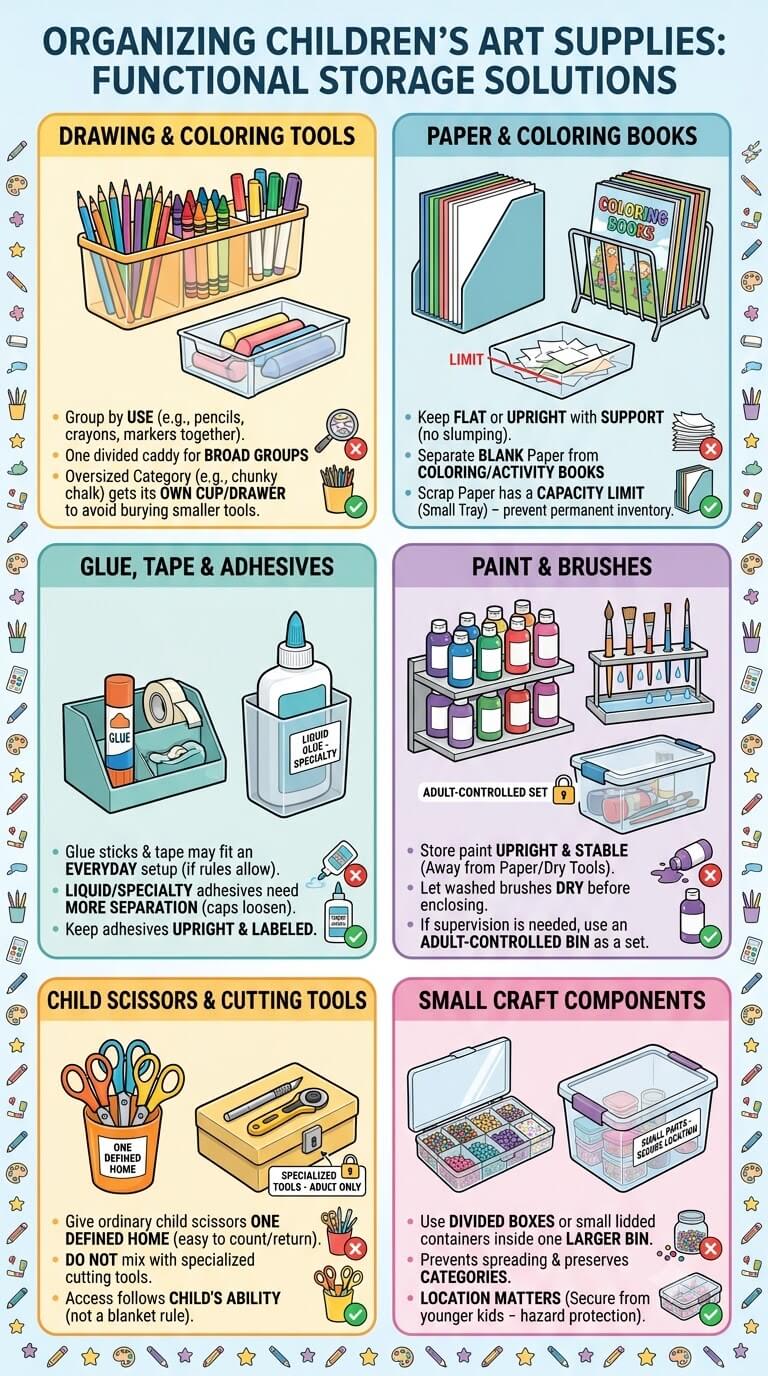
Drawing and coloring tools
Group crayons, colored pencils, pencils, and everyday markers by how they are used. One divided caddy can hold several broad groups without a bin for every color. Give an oversized category its own cup or shallow drawer so it does not bury smaller tools.
Paper and coloring books
Keep loose paper flat or upright with enough support that it does not slump into a pile. Separate blank paper from coloring or activity books if both are used often. Scrap paper can have one small tray, but give it a capacity limit so every offcut does not become permanent inventory.
Paint and brushes
Store paint upright in a stable area away from paper and dry tools. Keep brushes nearby if they are used together, but let washed brushes dry before enclosing them. If painting requires supervision, keep paint and brushes in one adult-controlled bin that comes out as a set.
Glue, tape, and adhesives
Glue sticks and tape may fit an everyday setup when labels and household rules allow it. Liquid glue and specialty adhesives need more separation because caps can loosen and instructions differ. Keep adhesives upright when directed, and avoid unlabeled containers.
Child scissors and cutting tools
Give ordinary child scissors one defined home so they are easy to count and return. Do not mix more specialized cutting tools into the same open cup simply because they are used for crafts. Access should follow the product instructions and the child’s ability to use the tool appropriately, not a blanket rule that all craft tools belong within reach.
Stickers, beads, sequins, and small craft components
Use a divided box or several small lidded containers inside one larger bin for tiny pieces. That keeps loose parts from spreading through drawers while preserving broad categories. If younger children share the space, storage location matters as much as container type because a closed organizer is not useful protection if it can be opened by a child for whom the contents present a hazard.
Separate Frequently Used and Occasional Supplies
Everyday drawing kit
Build a small daily kit around the supplies used most often, such as crayons, washable markers, pencils, and a modest stack of paper. Keep it easy to carry or reach. A limited kit reduces setup time and keeps backup storage closed during quick drawing sessions.
Supervised paint or glue supplies
Group materials that require setup or supervision so an adult can bring out one bin instead of gathering items from several places. Include only the tools used for that activity. The whole set then has one access point and one return destination.
Special-project materials
Foam sheets, specialty paper, stamps, seasonal materials, and rarely used embellishments can move to secondary storage. Label the broad project type rather than each event. Bring out the relevant bin only when needed, then return it afterward.
Keep low-use supplies from crowding the daily zone
A daily drawer stops working when children must dig through specialty supplies to reach a pencil. If an item is used only a few times a year, it does not need the same easy-access position as crayons or paper. Moving low-use supplies out of prime space is often more effective than adding another organizer to an already crowded station.
Separate Dry and Wet or Mess-Prone Materials
Crayons, pencils, and washable markers
Dry drawing tools can often share an open caddy or shallow drawer because they are easy to inspect and return. Keep caps with markers and retire tools that no longer work. “Washable” is still a product description, not permission to use the material on every surface.
Paint, liquid glue, and spill-prone materials
Keep liquids upright, closed, and separated from paper or textiles that could be damaged by a leak. A shallow washable tray under bottles can make small drips easier to contain. The Poison Control guidance on art products recommends reading labels and following instructions, which is a good reason to keep original product information with paints and adhesives.
Permanent or specialty materials
Permanent markers, specialty paints, solvents, hot tools, or other materials with stronger use restrictions should not be placed in a general child-access bin merely because they are used for art. Store them according to their labels, separated from everyday supplies, and keep adult-only materials in an adult-controlled location.
Do not assume washable means safe for every surface
A washable label may describe how a product performs under specified conditions, but surrounding surfaces still vary. Before moving art time to a new table, rug, wall-side desk, or upholstered area, check the product directions and the surface care instructions. Use a protective mat or easy-to-clean work surface when the material can stain or spread.
Decide Child-Accessible Versus Adult-Controlled Storage
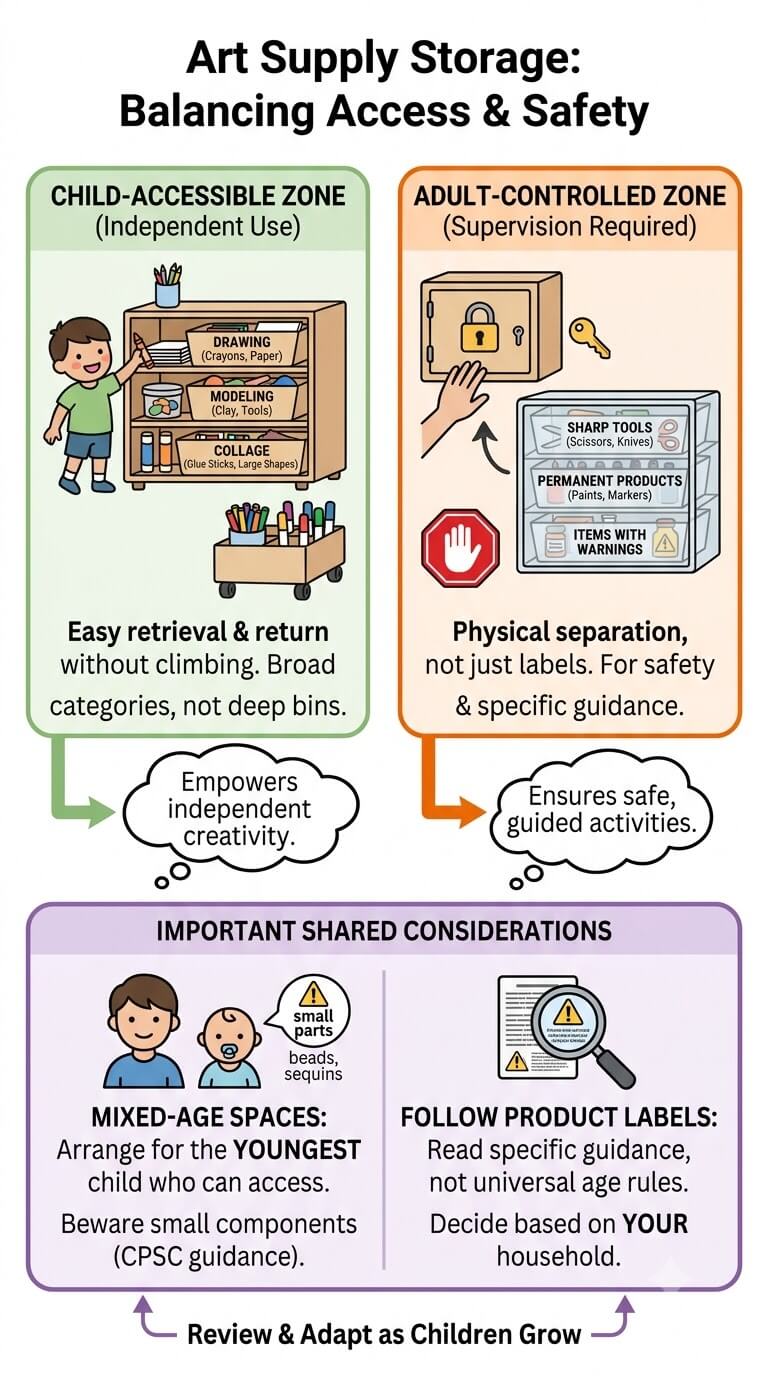
Independent-use supplies
Put independently used materials where the child can retrieve and return them without climbing or moving heavy containers. Choose a small number of broad categories so the storage is understandable at a glance. A low caddy, shallow drawer, or accessible shelf is more useful than a deep bin full of unrelated supplies.
Items that require supervision or age restrictions
Materials with warnings, sharper tools, permanent products, or supervision requirements belong in a separate adult-controlled zone. Do not rely on a label alone when a child cannot follow the directions. Make the separation physical and obvious.
Mixed-age sibling and small-parts considerations
A setup that works for an older child may not be appropriate when a toddler can reach the same shelf. Be especially careful with beads, sequins, loose hardware, tiny erasers, and other small components. The CPSC small-parts guidance explains why small components are a particular concern for young children, so shared spaces should be arranged for the youngest person who can actually access the materials.
Follow product labels rather than universal age rules
Do not assign one age at which every child can reach every art material. Products differ, and children differ in how they use them. Manufacturer guidance can also vary by item. Read the specific label and decide access within your own household rather than relying on a universal age rule.
Match Supplies to Containers
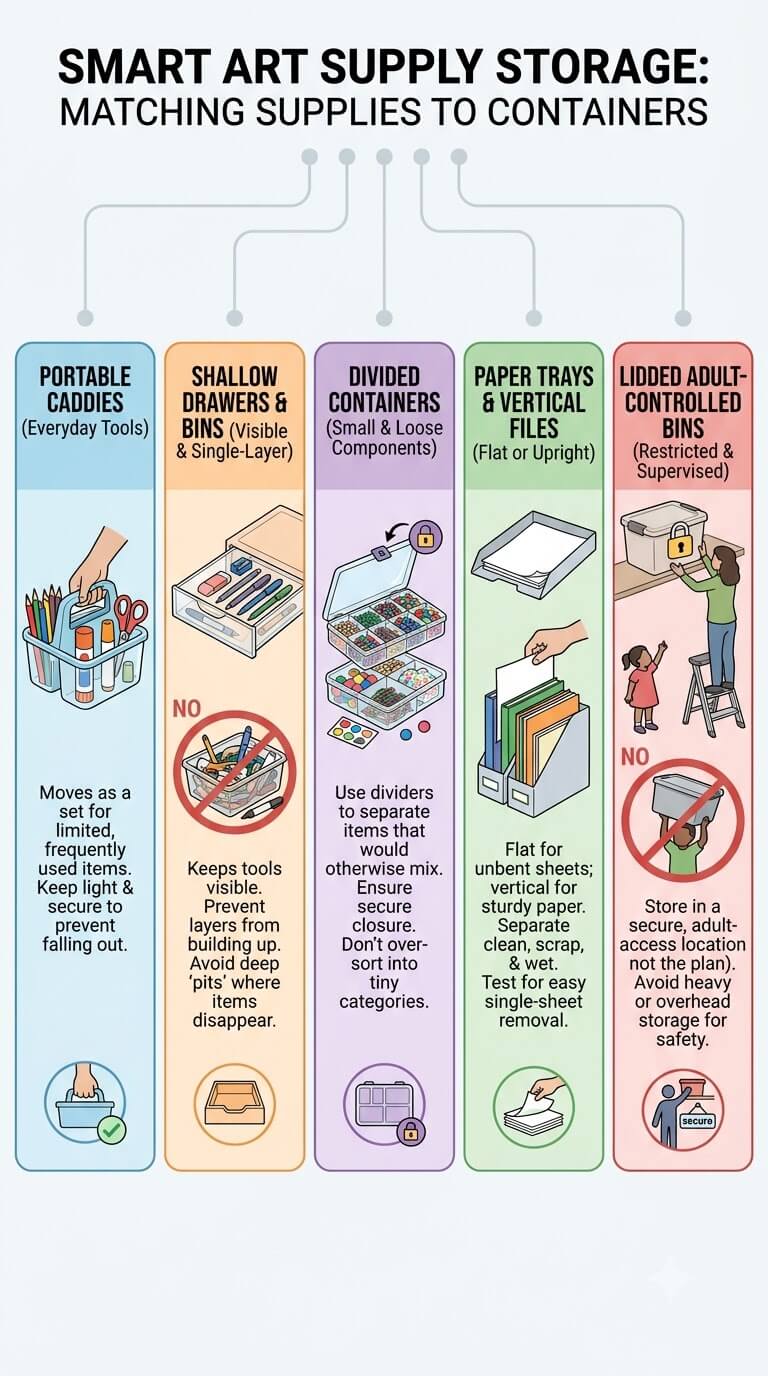
Portable caddies for everyday tools
A caddy works well for a limited set of pencils, crayons, markers, glue sticks, and child scissors because the whole set moves together. Keep it light enough for the intended user to carry safely. If items fall out whenever it moves, reduce the quantity or use better separation.
Shallow drawers and small bins
Shallow storage keeps tools visible and prevents layers from building up. Use one drawer for drawing tools, another for adhesives, or another for project accessories when the quantity justifies it. Avoid deep drawers that become mixed supply pits where dried markers and loose scraps disappear under newer items.
Divided containers for loose components
Dividers are useful for beads, pom-poms, clips, stickers, and other small pieces that would otherwise mix. The container should close securely enough for the intended storage location. Do not create dozens of tiny categories unless sorting them actually improves use and cleanup.
Paper trays and vertical paper storage
Use a flat tray for loose sheets that must stay unbent, or a vertical file-style holder for sturdy paper and activity books that can stand upright. Separate clean paper from scraps and wet artwork. A good test is whether one sheet can be removed without pulling the whole stack onto the floor.
Lidded adult-controlled bins for restricted items
A lidded bin can keep occasional or supervised supplies together, but the lid itself is not the access plan. Put the container in an appropriate adult-controlled location and follow any instructions for the storage product. Avoid containers that are too heavy to lift safely from their shelf or that require a child to reach overhead.
Build a Table-Side Art Zone
Keep only the current-use supplies near the work surface
Keep only drawing or crafting supplies beside the table. Extra categories create more setup and cleanup. Secondary materials can stay elsewhere until a specific project needs them.
Give paper a defined landing area
Paper needs a clean, dry home near the work surface but away from open paint and water cups. A tray or low shelf can hold blank sheets, while a second small spot can collect usable scraps. When the scrap area is full, review it instead of expanding it automatically.
Keep the zone small enough to reset
Design the area around what a child or caregiver can put away in a few minutes. If many containers must be opened after every session, the setup is too detailed. Broad categories such as drawing tools, paper, adhesives, and small craft pieces are often enough.
Let the playroom layout determine whether the zone belongs in the room
An art station does not have to be in the playroom. A small play area may need its floor and wall space for toys or books, while a nearby kitchen or dining table provides a better washable work surface. Choose the location based on access, cleanup, supervision, and available storage rather than forcing every child activity into one room. If the challenge is fitting this station into a tight room, plan the small playroom layout first and size the art zone to the space that remains.
Create a Portable Art Kit
Choose a limited set of portable supplies
Pick materials that travel well: a few drawing tools, a small pad, stickers, or another low-mess activity. Avoid filling the kit with the whole collection. A compact selection is easier to carry and less likely to scatter duplicates through the house.
Prevent portable kits from becoming duplicate junk drawers
Empty the kit periodically and return stray items to their main categories. Pens from the kitchen, random toy pieces, receipts, dried markers, and tiny paper scraps can turn a useful travel kit into a catch-all. The portable kit should be a temporary working set, not a second permanent inventory.
Return the kit to one home after use
Choose one shelf, hook, drawer, or cabinet where the kit always returns. If it moves between the car, bedroom, kitchen, and playroom without a home, supplies will gradually disappear into each location. Restock it from the main storage only when something is genuinely used up.
Manage In-Progress Projects
One project tray or defined holding area
Give unfinished work one tray, shallow bin, or shelf section. The space should hold the project plus the pieces that belong with it, not unrelated art supplies. A defined footprint prevents half-finished crafts from taking over the table, floor, and several counters at once.
Set a review point for abandoned projects
If the holding area fills, review the oldest projects before adding more space. Ask whether the project is still active, whether reusable materials should return to storage, and whether the rest can leave. A weekly or project-by-project check is enough for many households; the exact timing can follow how often art happens.
Keep finished artwork moving out of the work zone without building a full archive system
Finished work should leave the active supply area once dry. Display a few pieces, move selected work to a keepsake location, or recycle what no longer needs to stay. The supply zone needs an exit route, not permanent storage for every page.
Label for Cleanup, Not for Display
Broad supply labels
Label categories that help someone return items correctly: markers, paper, paint, glue, small craft pieces, or projects. Skip labels that do not change behavior. If everyone already recognizes the pencil cup, adding a decorative label does not make the system easier to use.
Picture or word labels when useful
Picture labels can help a child who does not yet read the category name, while simple words can support older children and adults. Use whichever makes cleanup clearer in your home. Keep labels visible from the position where supplies are actually returned.
Keep tiny loose components contained without creating excessive micro-categories
It may be useful to separate beads from buttons, but sorting every bead by color and size can create more cleanup work than value. The Art and Creative Materials Institute’s materials-safety information is also a reminder that packaging and safety markings matter; if you repackage loose materials, retain the information needed to identify and use them correctly.
Build a Restocking and Removal Routine
Remove dried-out or empty supplies
Do a quick functional check when a category begins to overflow. Test markers, close glue, discard empty packaging, and remove containers that no longer have useful contents. A drawer can look full while holding surprisingly little that works.
Refill only categories the household actually uses
Restock from observed use rather than from an idealized craft cabinet. If colored pencils remain untouched while markers are constantly depleted, replacement priorities are clear. Keep a short note of genuinely needed items instead of buying a large mixed set just because one category ran low.
Avoid buying duplicates because inventory is hidden
Before replacing tape, glue, paper, or markers, check secondary storage and portable kits. Hidden duplicates are common when supplies are split across rooms. One main home for backups makes inventory easier to see.
Cleanup Sequence After Art Time
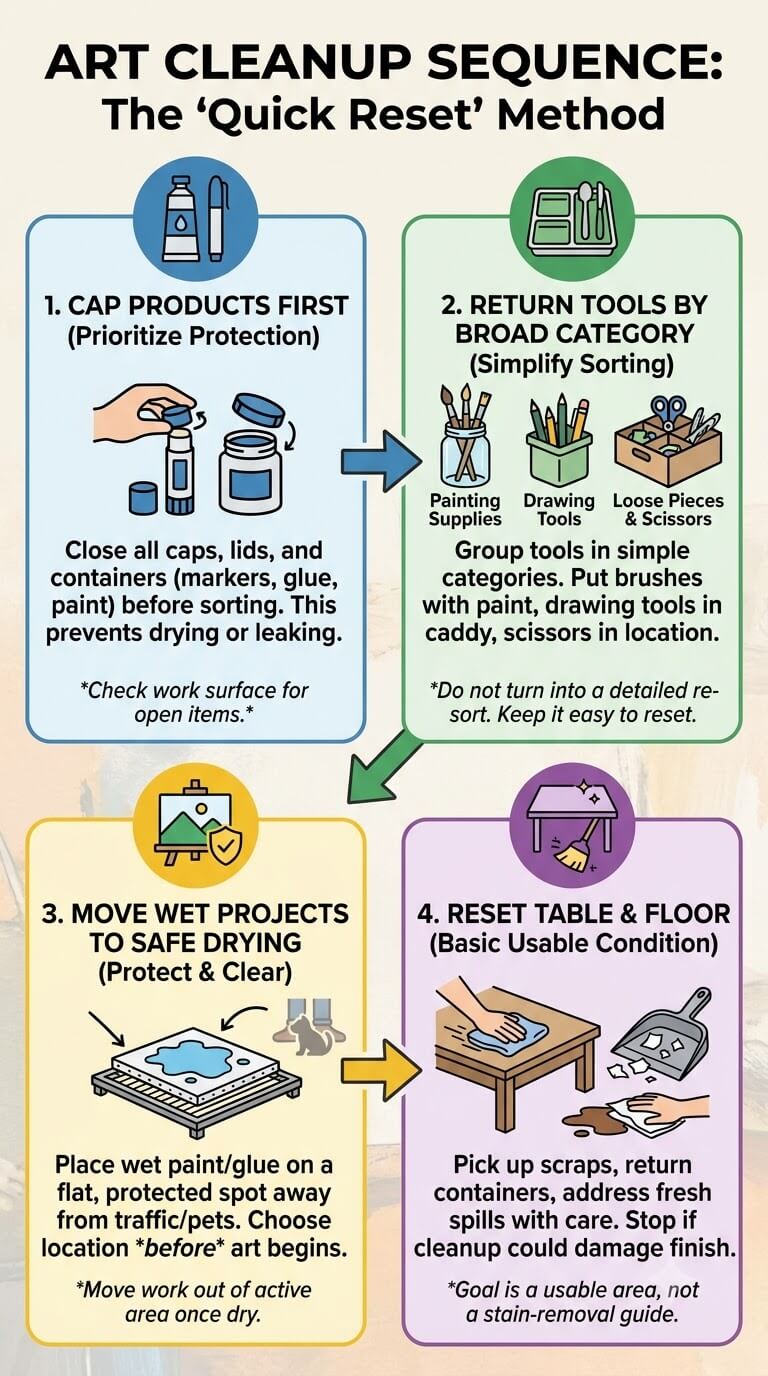
Close and cap products first
Before sorting anything else, close marker caps, glue lids, paint containers, and other products that can dry out or leak. This protects the supplies while the rest of cleanup happens. Check the work surface for open containers before moving projects away.
Return tools by broad category
Put brushes with painting supplies, drawing tools in their caddy, scissors in their defined location, and loose pieces in their main divided container. Do not turn cleanup into a detailed re-sort every time. The best categories are the ones people can reset correctly when they are tired or in a hurry.
Move wet projects to a safe drying location
Wet paint and glue need a flat, protected place away from foot traffic, pets, and supplies that could stick to the project. Choose the drying location before art begins when possible. Once the work is dry, move it out of the active area so the drying spot remains available.
Reset the table and floor without turning this into a stain-removal guide
Pick up scraps, return containers, and address fresh spills according to the product label and surface care instructions. Stop if a cleanup method could damage the finish or spread the material. The organization goal is simply to return the work area to usable condition and prevent leftover supplies from becoming floor clutter.
Common Art-Supply Organization Mistakes
Treating paint and glue like general toys
Wet products need more control than blocks or dolls because they can leak, dry out, and have specific use instructions. Giving every craft item equal access usually makes the station harder to supervise and reset. Separate by function and risk, not just by the fact that all the items are used during play.
Giving unrestricted access to every material
Easy cleanup does not require every supply to be reachable at all times. Keep everyday independent-use items accessible and move products that require supervision, special setup, or careful handling to an adult-controlled location. Guidance can differ by product; Crayola’s age guidance, for example, notes that readiness is not identical for every child.
Over-labeling tiny categories
Too many categories create decision fatigue during cleanup. If a child must choose among separate cups for red crayons, blue crayons, short crayons, and specialty crayons, the system may be more precise than useful. Broaden categories until returning supplies is obvious.
Keeping unusable supplies
Dried markers, hardened glue, broken crayons no one wants to reuse, and empty paint pots create false abundance. Review condition before buying more storage. A smaller collection of working tools is easier to maintain than a large drawer of uncertain supplies.
Creating duplicate stations in several rooms
Multiple art spots can work when each has a clear purpose, but accidental duplicates hide inventory. Choose one main storage area and keep only intentional mini-kits elsewhere. Restocking and cleanup then become easier to track.
When Supplies Should Move Out of the Playroom
Small-parts conflicts with younger siblings
If tiny craft pieces cannot be kept reliably away from a younger child who shares the room, move them to adult-controlled storage elsewhere. Do not depend on reminders alone when the physical access problem remains. Bring the materials out only when they can be used and put away under the appropriate conditions.
High-mess materials without a workable surface
Paint, liquid glue, or messy craft materials may be better stored near a kitchen, utility, or other suitable work surface if the playroom has carpet, tight circulation, or no practical cleanup area. The storage location should support how the material is actually used.
Occasional supplies consuming active storage
Large craft kits, seasonal supplies, bulk paper, and backup materials do not need prime playroom space if they come out rarely. Move them to a labeled secondary area and keep the active zone for current-use items. This is especially helpful in small playrooms where every shelf must earn its space.
Adult-controlled storage outside the child zone
An upper cabinet used only by adults, a locked utility area where appropriate, or another controlled location can hold materials that should not stay in the child-facing setup. Choose storage that follows the product instructions and does not require unsafe lifting or reaching. Keep enough identification with the items that an adult knows exactly what each container holds.
FAQ About Organizing Kids’ Art Supplies
Which art supplies should kids be able to reach?
Make independently used, low-mess supplies easy to reach only when their labels and your household rules support independent access. Crayons, pencils, paper, or certain markers may fit that group. Keep restricted, sharp, permanent, spill-prone, or small-component materials in a separate location when supervision or age guidance calls for it.
How should I organize paper and coloring books?
Keep blank paper flat in a tray or upright in a supportive file holder, depending on the paper type and available space. Give coloring and activity books their own shelf segment or vertical holder so they do not bury loose sheets. Limit scrap paper to one defined tray or folder.
What is the best way to store paint and glue?
Keep containers closed, upright when directed, and separated from paper and other absorbent materials. Group supervised paint or glue supplies in one stable bin or tray so an adult can bring out the set together. Preserve the original labels and follow the manufacturer’s storage and use instructions.
How do I keep tiny craft pieces from spreading everywhere?
Use one divided organizer or several small closed containers inside a larger category bin. Work over a tray when practical so dropped pieces are easier to collect. If younger children can access the area, move small components to a controlled location rather than relying only on compartment lids.
What should I do with unfinished art projects?
Give unfinished work one defined tray, shelf, or shallow bin and set a capacity limit. When the space fills, review the oldest projects before adding another holding area. Return reusable materials to their main storage and move finished work out of the supply zone once it is dry.
A manageable art area needs clear access decisions, broad categories, a small everyday selection, and a reliable exit for finished projects and used-up supplies. When cleanup takes too long, reduce what lives in the active zone before adding more storage.

Ethan Carter is the Founder & Editor of HomeCleanSecrets. Based in the United States, he has 5 years of experience creating practical home cleaning, laundry care, stain removal, decluttering, and home organization content. His goal is to help everyday households clean smarter and build simple routines that are easier to maintain.
Read more about Ethan Carter on his author page: https://homecleansecrets.com/ethan-carter/