
Cleaning an upholstered chair safely starts with the chair’s care instructions, not with a favorite household mixture. Fabric, padding, trim, and frame finishes can react differently to water, solvent, heat, and friction. A dining-chair seat may tolerate a carefully controlled water-based treatment, while a visually similar accent chair may require solvent-only care or dry maintenance. The safest sequence is to identify the chair, remove loose soil, test the permitted method, treat the smallest necessary area, and allow complete drying before use.
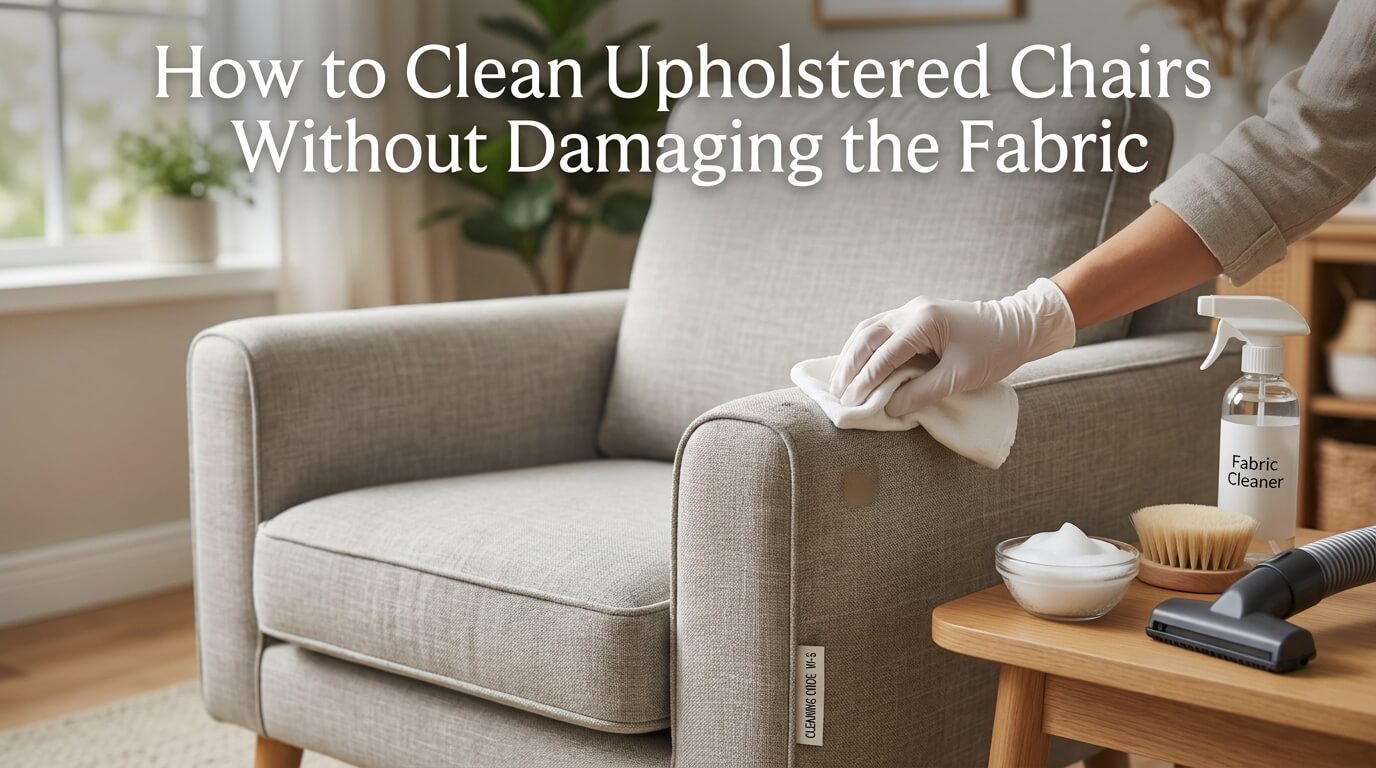
Quick Answer: Read the Upholstery Code First
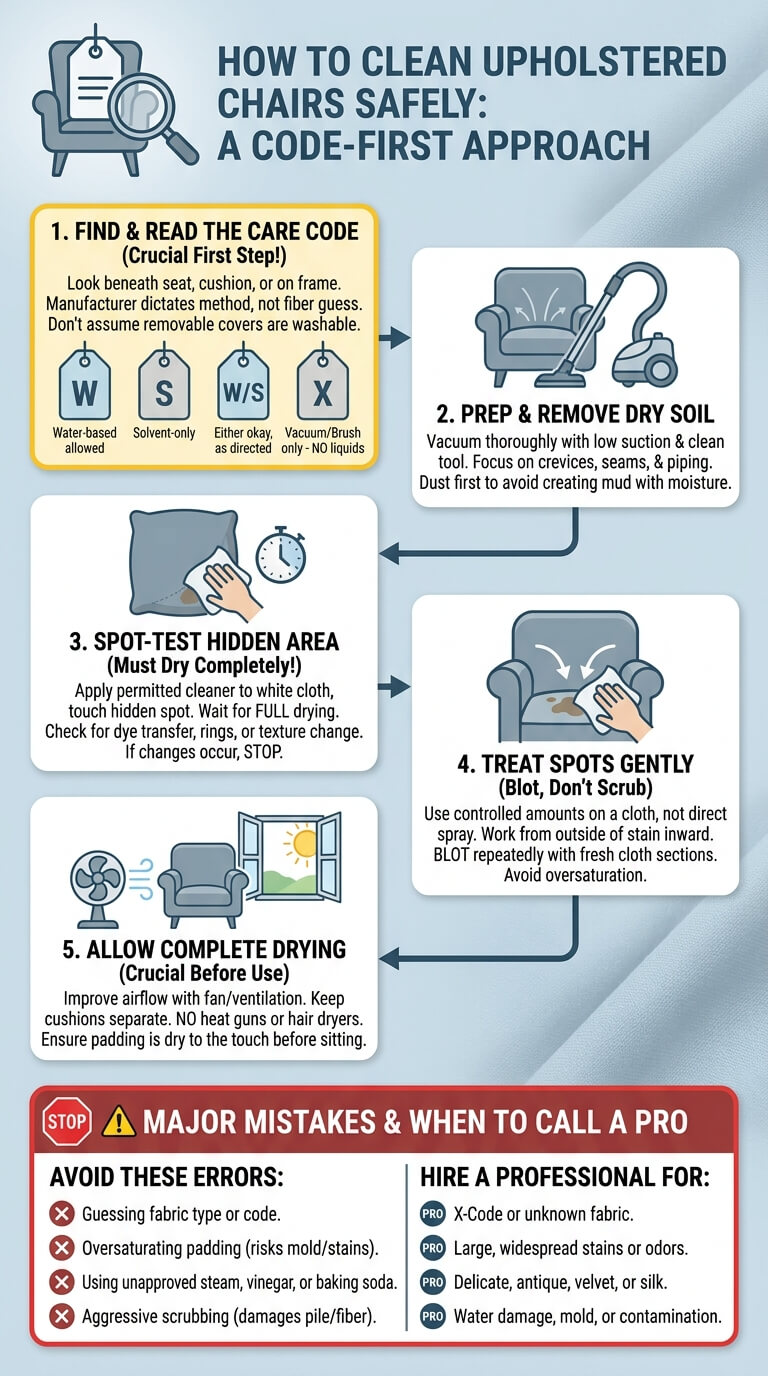
The care code determines whether liquid cleaning is appropriate. Find that information before applying cleaner, steam, or even a damp cloth. For the broader cleaning order and the relationship between routine, deep, furniture, floor, and textile tasks, use the bedroom and living room cleaning guide.
Find the tag or manufacturer instructions
Look beneath the seat, under a removable cushion, along the dust cover, or on the original receipt and product page. Record the model and fabric name when available because one chair design may be sold in several textiles with different instructions. Do not assume a removable cushion cover is washable unless its own label explicitly allows washing.
Understand W, S, W/S, and X limits
Code W generally permits a water-based upholstery product. Code S calls for an approved water-free solvent. W/S or S-W permits either category when used as directed. Code X limits routine care to vacuuming or light brushing, with professional help for stains. Manufacturer wording controls the decision, so review the chair’s exact instructions rather than relying only on the letter. La-Z-Boy’s fabric care instructions show why X fabric should not receive foam or liquid cleaner.
Stop when the code or fabric is unknown
Do not guess because the chair looks like polyester, linen, velvet, or microfiber. Blended fibers, backing, dyes, stain-resistant treatments, adhesives, and padding may set the real limit. This is especially important when the fabric is pale, richly colored, loosely woven, vintage, or already marked by an earlier cleaning attempt.
Identify the Chair Construction

Chair shape affects where dirt collects, how moisture moves, and which parts can be safely separated.
Upholstered dining chair
Dining chairs often have a compact padded seat, an upholstered back, or both. Food droplets concentrate along the front edge, seams, and the gap where the seat meets the frame. Work with the chair upright on a protected floor and control every application rather than spraying the entire seat.
Accent chair with fixed cushions
A fixed-seat accent chair may hide deep gaps beside the arms and back. Dust, coins, crumbs, and pet hair lodge in those channels, while body oil darkens the head and arm contact zones. Fixed upholstery cannot be taken elsewhere to dry, so plan strong room airflow and keep liquid away from joints, decorative wood, and the lower dust cover.
Removable seat cushion
Remove a cushion only when it lifts freely and the furniture directions permit it. Photograph its orientation, inspect both sides, and check whether the cover has a separate label. Clean the cushion as a complete upholstered component unless the instructions clearly say the cover may be removed and washed.
Tufted, piped, pleated, or trimmed upholstery
Buttons, folds, piping, nailheads, fringe, and decorative tape create soil traps and fragile edges. Vacuum these areas with reduced suction and support loose trim with your fingers without pulling it. Treat a small mark in controlled passes and blot the detail dry before moving to the next section.
Powered, reclining, antique, or specialty chair exclusions
Powered recliners, lift chairs, massage chairs, heated seats, office mechanisms, antique seating, and chairs with medical features require model-specific procedures. Electrical components, moving linkages, aged padding, fragile dyes, and historic trim add risks that this method does not cover. Disconnect power only as the manual directs, keep liquids away from controls, and arrange qualified service when access to wiring or mechanisms would be necessary.
Prepare the Chair and Work Area

A few minutes of preparation prevents accidental spreading, floor damage, and rushed decisions while the fabric is damp.
Photograph existing stains and color variation
Take clear photos in daylight before cleaning. Include the full panel and a close view of each mark. Photos help you compare the dry result and explain the chair’s condition if professional treatment becomes necessary.
Vacuum test on a hidden area
Set the vacuum to low suction and use a clean upholstery attachment without a rotating brush. Test beneath the cushion or near the lower back. Use a screen of clean nylon mesh between nozzle and fragile fabric when the maker approves that approach.
Protect wood, metal, floor, and nearby textiles
Place the chair on a clean waterproof mat or several absorbent towels that will not transfer dye. Cover exposed wood and metal near the treatment area without using tape on a delicate finish. If the chair has removable legs or caps, do not disassemble them merely for cleaning unless the manual calls for it.
Use clean white cloths and controlled product amounts
White, lint-free cloths make dye transfer and soil easier to see. Prepare several so a dirty section is never rubbed back across the fabric. Apply product to the cloth, sponge, or approved tool unless the label specifically instructs direct spraying. The American Cleaning Institute recommends checking product directions and caution statements before use. Never combine cleaners.
Plan airflow and drying time
Choose a day when the chair can remain unused until fully dry. Open an interior door and use normal ventilation or a fan aimed across, not forcefully into, the fabric. Avoid cleaning late at night, immediately before guests arrive, or when humid conditions make drying uncertain.
Step 1: Remove Dry Soil

Dry removal comes first because added moisture can turn crumbs, dust, and loose pigment into smears or muddy residue. For dry dust removal across the exposed frame and nearby furniture, see how to remove dust from furniture.
Vacuum from top to bottom
Start at the upper back, then clean arms, seat, cushion sides, and lower panels. Use slow overlapping passes with the nozzle slightly above delicate fabric rather than pressing hard. Finish with the area beneath a removable cushion so dislodged debris is not returned to a cleaned surface.
Clean seams, piping, buttons, and cushion gaps
Use a crevice tool near, not against, the fabric when clearance permits. A soft brush can loosen grit from a seam while the vacuum captures it. For narrow chair gaps, a clean flexible nozzle is safer than forcing a rigid tool that could tear the upholstery or scratch the frame.
Lift pet hair without pulling fibers
Vacuum first, then use a clean rubber pet-hair tool, slightly dampened glove, or manufacturer-approved fabric brush with light strokes. Test any tacky roller because strong adhesive can lift nap or leave residue. Heavy embedded hair may need repeated gentle passes rather than extra pressure.
Brush only when the fabric tolerates it
Brushing can restore some durable pile after vacuuming, but it can also snag boucle, loosen chenille, roughen velvet, or alter a delicate nap. Check the care guide and use the recommended brush type. Do not use a stiff household scrub brush, wire brush, or powered drill attachment on upholstery.
Step 2: Spot-Test the Approved Method
A hidden test must dry completely before the visible stain is treated. Wet fabric can conceal changes that appear later.
Test for dye transfer
Apply a tiny amount of the permitted cleaner to a white cloth and touch a concealed section using the same pressure planned for the stain. Inspect the cloth for dye and compare the area with surrounding fabric. Solvent and water can each move different dyes.
Check texture, pile direction, rings, and shrinkage
Look at the test from several angles after blotting. Check for a hard edge, flattened pile, stiffness, puckering, loosened backing, raised fibers, or a changed sheen. Feel the seam for tightening and compare dimensions around piping. Herman Miller’s textile care guidance emphasizes concealed testing and avoiding aggressive scrubbing when treating spots.
Let the test area dry before deciding
Wait until the fabric, seam, and padding feel dry and return to room temperature. Drying may take several hours depending on fabric, cushion thickness, airflow, and the amount applied. Continue only when the dry area has normal color, hand, shape, and odor.
Step 3: Treat Spots by Soil Type

Remove excess material first, then use only the method allowed by the chair instructions. Do not chase an old stain through repeated experiments.
Water-based food or drink spill
Blot fresh liquid with a dry white cloth, changing to a clean section frequently. Lift solid food with a spoon without grinding it into the weave. Keep liquid away from wood rails and seams.
Greasy residue
Scrape away a thick deposit gently with a dull plastic edge. Do not add water automatically because grease may spread. Stop if a halo grows or the coating changes.
Mud or dry particulate soil
Let ordinary mud dry unless the substance is hazardous or strongly colored. Break the dry deposit with a soft approved brush and vacuum it away. Do not brush fragile loops or trim.
Body oil and hand-contact darkening
Dark arms, head zones, and seat fronts usually develop gradually and may cover a broad panel rather than one spot. Vacuum thoroughly and test the permitted cleaner. If the affected area is large, evenly soiled, or near a contrasting wood finish, professional cleaning is safer than repeated local applications.
Unknown or old stain
Photograph the mark and note its texture, odor, location, and whether it changes when dry. Do not cycle through alcohol, peroxide, dish soap, vinegar, enzyme products, and solvent in search of a reaction. Limit work to the approved method and stop after a careful attempt if there is no improvement.
Blotting and working from the outside inward
Press a folded cloth onto the mark and lift vertically. Rotate to a clean area each time. Rubbing back and forth can distort yarns, abrade color, and drive soil deeper.
Step 4: Clean a Larger Upholstered Area Only When Allowed

Panel cleaning is appropriate only when the manufacturer permits it and the test has dried without change.
Apply minimal moisture or approved solvent
Divide a seat or back panel into manageable sections. Apply a light, even amount with the recommended cloth, sponge, foam, or machine. For an accent chair, protect adjacent arms and skirt panels.
Keep treatment even to reduce rings
Follow the natural boundaries of a panel, such as piping or a seam, rather than stopping randomly in the center. Use overlapping passes and consistent pressure. If the care guide calls for cleaning the full panel, work steadily so one section does not dry long before the next.
Avoid soaking padding and seams
Padding holds much more moisture than the face fabric reveals. Saturation can prolong drying, carry soil back to the surface, affect adhesives, stain unfinished wood, or create odor. Stop if liquid appears underneath, the cushion feels noticeably heavy, or the fabric stays cool and wet after blotting. When the chair is part of a larger hidden-dust or furniture-movement project, use the guide to deep clean a living room.
Extract or blot residue according to instructions
Some approved methods require blotting with a clean damp cloth, while others use controlled extraction. Do exactly what the chair and cleaner directions state. Steelcase advises that soft surfaces should be dampened rather than soaked and then allowed to air dry completely. A portable machine is not automatically suitable for every chair, even when its nozzle fits.
Clean the Exposed Frame and Underside
Fabric care is only part of the job. Protect adjacent finishes and avoid disturbing structural components.
Wood and painted frames
Vacuum dry dust with a soft brush, then follow the furniture maker’s finish directions. Apply a compatible cleaner to a cloth instead of spraying near upholstery. Furniture polish is not a universal cleaner.
Metal frames and hardware
Dust around legs, brackets, nailheads, and exposed fasteners. Use a method approved for the metal finish and keep product off the fabric. A wobble, crack, or bent connection needs repair rather than cosmetic cleaning.
Dust covers and underside fabric
Tilt a light chair only when you can control it safely, or ask another adult to help. Vacuum the underside dust cover with low suction without puncturing it. Tears, sagging webbing, protruding springs, powdery foam, droppings, or nesting material are reasons to stop and obtain appropriate help.
Floor-contact glides and nearby debris
Lift rather than drag the chair when possible. Vacuum around feet and inspect glides for trapped grit that can scratch flooring. Clean the floor beneath the chair while it is moved, then let that area dry.
Dry the Chair Completely
Drying is part of cleaning, not a waiting period that can be skipped.
Increase airflow without direct high heat
Use room ventilation, air conditioning, a dehumidifier when appropriate, or a fan moving air across the chair. Avoid heaters, hair dryers, heat guns, and direct intense sun because they can shrink fabric, set residue, weaken adhesives, fade dye, or dry the surface while padding remains wet. Keep the chair away from a damp wall.
Keep cushions separated when possible
Stand a removable cushion on a clean edge or support it as its instructions allow so air reaches more than one side. Do not balance it where it can fall, stretch, or touch a dirty floor. Keep fixed cushions open to airflow by leaving the chair unobstructed.
Do not sit on damp upholstery
Body pressure can compress wet padding, create new rings, transfer clothing dye, and distort pile. Place a note on the chair or move it out of normal traffic. A surface that feels dry may still feel cool because moisture remains below.
Recheck odor, rings, stiffness, and color after drying
Inspect the chair in daylight from several angles. Compare it with the photos taken before cleaning. Stop using the chair until the cause and safe next step are clear.
Special Chair Problems
Some common chair messes need a narrower response than full-panel cleaning.
Pet hair and light pet odor
Remove hair dry before considering any product. Vacuum gaps, piping, and both cushion sides. Urine, repeated accidents, or odor returning after drying may indicate contamination in the padding and needs professional assessment.
Dining-chair food spills
Respond quickly, but first move the chair away from the table to prevent a second spill. Lift food, blot liquid, identify whether the residue is water-based or oily, and follow the care code. Sauce or drink that reached unfinished wood or foam requires more caution than a small surface droplet.
Makeup or hair-product transfer
Foundation, hair oil, styling products, and sunscreen can leave greasy, pigmented buildup on chair backs and arms. Do not rub with a makeup wipe because its oils, alcohol, or color may create another mark. Clean frequently touched hard trim separately so residue does not migrate back to the fabric.
Water rings from prior cleaning
A ring may result from excess moisture, dissolved soil moving outward, cleaner residue, minerals in water, or a changed pile. Do not wet only the dark boundary. X fabric and unknown textiles should not be re-wetted.
Vintage fabric or fragile trim
Age can weaken yarn, backing, thread, glue, foam, and dyes even when the chair appears sound. Limit home care to the gentlest approved dry dust removal. An upholstery conservator or cleaner experienced with older furniture is a better choice for stains, odor, water damage, or structural repairs.
Mistakes to Avoid
Most avoidable damage comes from using an unapproved method, too much product, or too much force.
Guessing the care code
Appearance cannot confirm whether water or solvent is safe. Two beige chairs may use different fiber blends, dye systems, backings, and finishes. A general fabric recipe is not a substitute for the chair’s own instructions.
Scrubbing or saturating the fabric
Aggressive scrubbing can fuzz yarn, flatten pile, spread pigment, loosen trim, and create a permanently lighter patch. Saturation can carry soil into padding and slow drying. Stop when repeated treatment is producing more wetness than improvement.
Using steam, vinegar, baking soda, or detergent without approval
Heat, acid, alkaline powder, fragrance, surfactant residue, and excess moisture can each cause problems on certain textiles. Baking soda can lodge in dark or textured fabric, and household detergent may be difficult to remove from padding. Use a product and process specifically permitted for that chair instead of assuming a familiar ingredient is gentle.
Cleaning only the center of a visible panel
Treating a small bright circle in the middle of an evenly soiled seat can leave an obvious contrast. Start with dry removal, identify whether the mark is local or the whole panel is darkened, and follow the maker’s directions for spot or panel care. Large-area soil is often better handled by a professional.
Ignoring frame finishes and metal hardware
An upholstery-safe product may still cloud wood, soften paint, tarnish metal, or stain unfinished parts. Cover adjacent surfaces, use controlled amounts, and blot drips immediately. Never allow solvent to pool around nailheads, buttons, staples, joints, powered controls, or plastic trim.
When to Hire a Professional
Professional help is appropriate when the textile, size of the problem, or chair construction makes a safe home result uncertain.
X-code or unknown upholstery
X fabric should receive dry maintenance only at home unless the manufacturer states otherwise. Unknown upholstery should be treated the same way. Ask what testing will be done and how wood, trim, and flooring will be protected.
Large stains, widespread odor, or dye transfer
Call for help when a stain covers much of a seat or back, odor returns after drying, color transfers during the hidden test, or several chairs need even results. Repeated spot treatment can produce overlapping rings. Explain what spilled, when it happened, and every product already used so the cleaner can assess likely reactions.
Silk, velvet, suede, antique, or specialty textiles
These materials may have sensitive pile, dyes, finishes, or construction that require specialized inspection. Do not assume all velvet or suede is cleaned the same way. Ask whether the cleaner has experience with that exact textile and with decorative trim or aged upholstery.
Mold, water damage, or contaminated padding
Stop DIY cleaning when the chair was soaked, remained damp, has visible growth, smells strongly musty, contains sewage or flood contamination, or has padding affected by repeated pet accidents. Surface treatment may not reach the problem. The IICRC’s upholstery cleaning standard information reflects the inspection and procedural scope involved in professional work. Replacement may be safer when contamination cannot be removed.
Frequently Asked Questions
These answers cover the decisions that most often cause uncertainty during chair cleaning.
What do W, S, W/S, and X upholstery codes mean?
W generally permits an approved water-based upholstery cleaner. S generally calls for a water-free solvent. The manufacturer’s full wording always takes priority because application, rinsing, and drying limits vary.
Can I use a carpet cleaner on an upholstered chair?
Only when the chair manufacturer and the machine instructions both approve that use, including the solution, attachment, moisture level, and extraction method. A machine marketed for upholstery is not safe for every fabric. Never use it on X-code, unknown, fragile, antique, powered, or solvent-only upholstery without explicit approval.
How do I avoid water rings?
Check that water-based care is allowed, vacuum first, spot-test to a fully dry result, use a very small and even amount, work from the edge inward, and blot residue promptly. Follow panel boundaries when broader treatment is permitted. Distilled water may be required by some manufacturers, but it does not make an unapproved wet method safe.
Can I steam clean a fabric dining chair?
Do not use steam unless the chair manufacturer specifically permits the machine, temperature, solution, and procedure. Heat and moisture can affect dye, backing, glue, foam, wood, and seams. Use the written care method or arrange professional cleaning.
How long does an upholstered chair take to dry?
Drying may take several hours or longer, depending on fabric, padding, room humidity, airflow, and how much liquid entered the chair. Use it only when the seat, seams, cushion core, and underside are dry with no cool damp feel or new odor. If it remains damp unusually long, seek advice rather than adding heat.
How often should upholstered chairs be vacuumed?
Vacuum chairs as needed based on use, usually during regular room cleaning and more often in homes with pets, children, dining spills, or dusty conditions. Use low suction and an appropriate attachment. Prompt dry-soil removal reduces the need for wet treatment and gives you a chance to notice loose trim, stains, or damage early.
Final Thoughts
The safest way to clean upholstered chairs is to let the chair’s instructions control every decision. Confirm the care code, understand the construction, remove dry soil, test the approved method, and treat only as much fabric as necessary. Protect the frame and floor, keep moisture controlled, and allow complete drying before anyone sits down. Stop when color moves, texture changes, a ring expands, padding stays damp, or the fabric is unknown. Careful limits usually protect a chair better than stronger products or repeated experiments.

Ethan Carter is the Founder & Editor of HomeCleanSecrets. Based in the United States, he has 5 years of experience creating practical home cleaning, laundry care, stain removal, decluttering, and home organization content. His goal is to help everyday households clean smarter and build simple routines that are easier to maintain.
Read more about Ethan Carter on his author page: https://homecleansecrets.com/ethan-carter/