
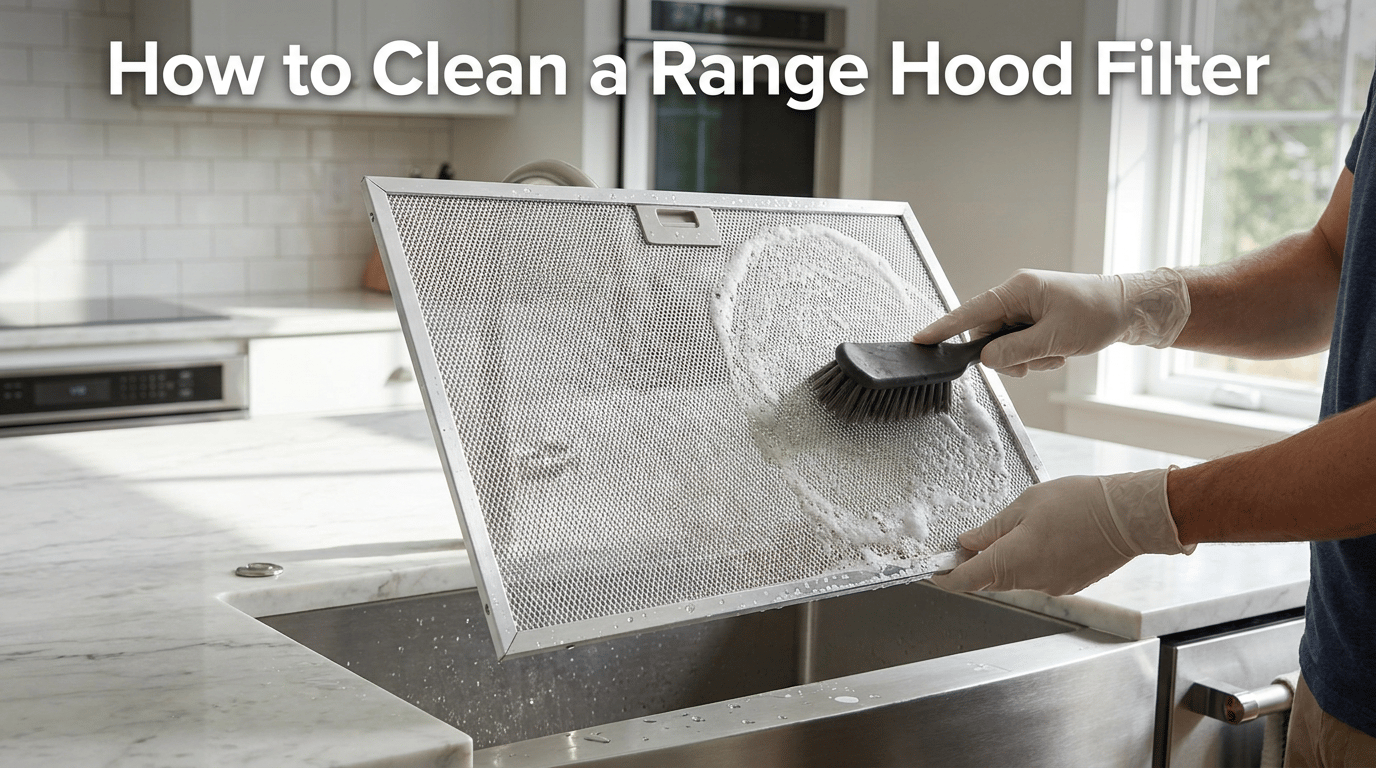
If you want to clean a range hood filter without damaging surfaces or creating food-prep risks, start with a clear order. This guide walks through metal grease filters, baffle filters, filter frames, and the underside of the hood with a practical, safety-first method for readers who want the job done properly.
The advice below avoids unsupported shortcuts and keeps claims conservative. Where food safety, disinfecting, or cleaner choice matters, use product labels and trusted food-safety guidance as the final reference.
Quick Answer: The Best Way to Clean a Range Hood Filter
The best way to clean a range hood filter is to follow a steady order instead of jumping between tasks. For range hood filter, focus on metal grease filters, baffle filters, filter frames, and the underside of the hood, then finish by drying or resetting the area so grime does not return right away.
Use this guide as a practical checklist. It follows the approved outline, keeps safety language conservative, and uses trusted outbound sources when the topic touches sticky grease, weak airflow, smoke, odors, and wet reinstallation.
Best method for metal grease filters
For best method for metal grease filters, keep the process simple: remove loose soil, apply the right cleaner sparingly, give it time to work, wipe or scrub gently, and dry the area before moving on.
Remove the filter
Remove the filter is a detail step. Use light pressure, keep the cloth or brush clean, and dry the area before moving on.
Soak in hot soapy water
Soak in hot soapy water is a detail step. Use light pressure, keep the cloth or brush clean, and dry the area before moving on.
Add degreaser if needed
Add degreaser if needed is a detail step. Use light pressure, keep the cloth or brush clean, and dry the area before moving on.
Scrub gently
Scrub gently is a detail step. Use light pressure, keep the cloth or brush clean, and dry the area before moving on.
Rinse and dry completely
Rinse and dry completely is a detail step. Use light pressure, keep the cloth or brush clean, and dry the area before moving on.
What changes for charcoal filters
The practical answer is to clean range hood filter in stages: remove loose mess, use a surface-safe cleaner, rinse or wipe away residue when required, dry fully, and repeat maintenance before buildup becomes stubborn.
Usually not washable
Usually not washable is a detail step. Use light pressure, keep the cloth or brush clean, and dry the area before moving on.
Replace when saturated
Replace when saturated is a detail step. Use light pressure, keep the cloth or brush clean, and dry the area before moving on.
Check the manual
Check the manual is a detail step. Use light pressure, keep the cloth or brush clean, and dry the area before moving on.
What to avoid
The biggest mistakes usually come from rushing: using the wrong cleaner, skipping dry prep, letting residue sit, or cleaning in an order that creates more work. With range hood filter, patience protects both the surface and the result.
If you are unsure whether a cleaner, scraper, soak, or disinfectant is safe, check the product label and the appliance or surface manual. A careful pause is better than damaging a finish or leaving residue near food.
Reinstalling a wet filter
Reinstalling a wet filter is a detail step. Use light pressure, keep the cloth or brush clean, and dry the area before moving on.
Bending mesh
Bending mesh is a detail step. Use light pressure, keep the cloth or brush clean, and dry the area before moving on.
Using harsh chemicals without ventilation
Using harsh chemicals without ventilation is a detail step. Use light pressure, keep the cloth or brush clean, and dry the area before moving on.
For a related walkthrough, see our guide to how to clean a gas stove burner.
For a related walkthrough, see our guide to how to clean a glass stove top.
For a related walkthrough, see our guide to how to clean a kitchen.
Identify Your Range Hood Filter Type

This section focuses on identify your range hood filter type as part of the larger job of cleaning range hood filter. The goal is to handle the mess in the right order, protect the surface, and avoid spreading residue to clean areas.
Work calmly through the steps below. If the surface reacts poorly, the part does not remove easily, or the cleaner label conflicts with this guide, stop and follow the manufacturer instructions.
Metal mesh filter
For metal mesh filter, keep the process simple: remove loose soil, apply the right cleaner sparingly, give it time to work, wipe or scrub gently, and dry the area before moving on.
Common washable type
Common washable type is a detail step. Use light pressure, keep the cloth or brush clean, and dry the area before moving on.
Grease trapped in layers
Grease trapped in layers is a detail step. Use light pressure, keep the cloth or brush clean, and dry the area before moving on.
Baffle filter
For baffle filter, keep the process simple: remove loose soil, apply the right cleaner sparingly, give it time to work, wipe or scrub gently, and dry the area before moving on.
Metal panels
Metal panels is a detail step. Use light pressure, keep the cloth or brush clean, and dry the area before moving on.
Often used in stronger hoods
Often used in stronger hoods is a detail step. Use light pressure, keep the cloth or brush clean, and dry the area before moving on.
Charcoal filter
For charcoal filter, keep the process simple: remove loose soil, apply the right cleaner sparingly, give it time to work, wipe or scrub gently, and dry the area before moving on.
Odor absorption role
Odor absorption role is a detail step. Use light pressure, keep the cloth or brush clean, and dry the area before moving on.
Replacement instead of washing
Replacement instead of washing is a detail step. Use light pressure, keep the cloth or brush clean, and dry the area before moving on.
Combination systems
For combination systems, keep the process simple: remove loose soil, apply the right cleaner sparingly, give it time to work, wipe or scrub gently, and dry the area before moving on.
Grease filter plus charcoal filter
Grease filter plus charcoal filter is a detail step. Use light pressure, keep the cloth or brush clean, and dry the area before moving on.
Why each part needs different care
The practical answer is to clean range hood filter in stages: remove loose mess, use a surface-safe cleaner, rinse or wipe away residue when required, dry fully, and repeat maintenance before buildup becomes stubborn.
Supplies You Need
You do not need a complicated kit for range hood filter. Start with clean microfiber cloths, a non-scratch sponge or brush, dish soap, a dry towel, and a cleaner that is safe for the material you are working on.
When choosing products, avoid the habit of using one harsh cleaner everywhere. The EPA’s safer product guidance can help readers think about safer product choices, especially for routine home cleaning.
Basic supplies
You do not need a complicated kit for range hood filter. Start with clean microfiber cloths, a non-scratch sponge or brush, dish soap, a dry towel, and a cleaner that is safe for the material you are working on.
When choosing products, avoid the habit of using one harsh cleaner everywhere. The EPA’s safer product guidance can help readers think about safer product choices, especially for routine home cleaning.
Sink or large basin
Sink or large basin is a detail step. Use light pressure, keep the cloth or brush clean, and dry the area before moving on.
Dish soap
Dish soap is a detail step. Use light pressure, keep the cloth or brush clean, and dry the area before moving on.
Hot water
Hot water is a detail step. Use light pressure, keep the cloth or brush clean, and dry the area before moving on.
Soft brush
Soft brush is a detail step. Use light pressure, keep the cloth or brush clean, and dry the area before moving on.
Gloves
Gloves is a detail step. Use light pressure, keep the cloth or brush clean, and dry the area before moving on.
Degreasing options
For degreasing options, keep the process simple: remove loose soil, apply the right cleaner sparingly, give it time to work, wipe or scrub gently, and dry the area before moving on.
Kitchen degreaser
Kitchen degreaser is a detail step. Use light pressure, keep the cloth or brush clean, and dry the area before moving on.
Baking soda for suitable filters
Baking soda for suitable filters is a detail step. Use light pressure, keep the cloth or brush clean, and dry the area before moving on.
Dishwasher only if manual allows it
Dishwasher only if manual allows it is a detail step. Use light pressure, keep the cloth or brush clean, and dry the area before moving on.
Drying supplies
You do not need a complicated kit for range hood filter. Start with clean microfiber cloths, a non-scratch sponge or brush, dish soap, a dry towel, and a cleaner that is safe for the material you are working on.
When choosing products, avoid the habit of using one harsh cleaner everywhere. The EPA’s safer product guidance can help readers think about safer product choices, especially for routine home cleaning.
Towels
Towels is a detail step. Use light pressure, keep the cloth or brush clean, and dry the area before moving on.
Drying rack
Drying rack is a detail step. Use light pressure, keep the cloth or brush clean, and dry the area before moving on.
Time for full air drying
Time for full air drying is a detail step. Use light pressure, keep the cloth or brush clean, and dry the area before moving on.
Step 1: Remove the Range Hood Filter
This section focuses on step 1: remove the range hood filter as part of the larger job of cleaning range hood filter. The goal is to handle the mess in the right order, protect the surface, and avoid spreading residue to clean areas.
Work calmly through the steps below. If the surface reacts poorly, the part does not remove easily, or the cleaner label conflicts with this guide, stop and follow the manufacturer instructions.
Turn off the range hood
For turn off the range hood, keep the process simple: remove loose soil, apply the right cleaner sparingly, give it time to work, wipe or scrub gently, and dry the area before moving on.
Fan off
Fan off is a detail step. Use light pressure, keep the cloth or brush clean, and dry the area before moving on.
Lights cool
Lights cool is a detail step. Use light pressure, keep the cloth or brush clean, and dry the area before moving on.
Release the filter carefully
For release the filter carefully, keep the process simple: remove loose soil, apply the right cleaner sparingly, give it time to work, wipe or scrub gently, and dry the area before moving on.
Slide or latch mechanism
Slide or latch mechanism is a detail step. Use light pressure, keep the cloth or brush clean, and dry the area before moving on.
Support with both hands
Support with both hands is a detail step. Use light pressure, keep the cloth or brush clean, and dry the area before moving on.
Inspect before washing
For inspect before washing, keep the process simple: remove loose soil, apply the right cleaner sparingly, give it time to work, wipe or scrub gently, and dry the area before moving on.
Grease thickness
Grease thickness is a detail step. Use light pressure, keep the cloth or brush clean, and dry the area before moving on.
Bent mesh
Bent mesh is a detail step. Use light pressure, keep the cloth or brush clean, and dry the area before moving on.
Filter type label
Filter type label is a detail step. Use light pressure, keep the cloth or brush clean, and dry the area before moving on.
Step 2: Soak the Filter to Loosen Grease

This section focuses on step 2: soak the filter to loosen grease as part of the larger job of cleaning range hood filter. The goal is to handle the mess in the right order, protect the surface, and avoid spreading residue to clean areas.
Work calmly through the steps below. If the surface reacts poorly, the part does not remove easily, or the cleaner label conflicts with this guide, stop and follow the manufacturer instructions.
Fill with hot soapy water
For fill with hot soapy water, keep the process simple: remove loose soil, apply the right cleaner sparingly, give it time to work, wipe or scrub gently, and dry the area before moving on.
Fully submerge the filter
Fully submerge the filter is a detail step. Use light pressure, keep the cloth or brush clean, and dry the area before moving on.
Use enough soap to cut grease
Use enough soap to cut grease is a detail step. Use light pressure, keep the cloth or brush clean, and dry the area before moving on.
Add degreaser if needed
For add degreaser if needed, keep the process simple: remove loose soil, apply the right cleaner sparingly, give it time to work, wipe or scrub gently, and dry the area before moving on.
Follow product label
Follow product label is a detail step. Use light pressure, keep the cloth or brush clean, and dry the area before moving on.
Ventilate the area
Ventilate the area is a detail step. Use light pressure, keep the cloth or brush clean, and dry the area before moving on.
Let it sit
For let it sit, keep the process simple: remove loose soil, apply the right cleaner sparingly, give it time to work, wipe or scrub gently, and dry the area before moving on.
Light grease soak time
Light grease soak time is a detail step. Use light pressure, keep the cloth or brush clean, and dry the area before moving on.
Heavy grease soak time
Heavy grease soak time is a detail step. Use light pressure, keep the cloth or brush clean, and dry the area before moving on.
When to refresh dirty water
When to refresh dirty water is a detail step. Use light pressure, keep the cloth or brush clean, and dry the area before moving on.
Step 3: Scrub Without Damaging the Filter
This section focuses on step 3: scrub without damaging the filter as part of the larger job of cleaning range hood filter. The goal is to handle the mess in the right order, protect the surface, and avoid spreading residue to clean areas.
Work calmly through the steps below. If the surface reacts poorly, the part does not remove easily, or the cleaner label conflicts with this guide, stop and follow the manufacturer instructions.
Scrub both sides
For scrub both sides, keep the process simple: remove loose soil, apply the right cleaner sparingly, give it time to work, wipe or scrub gently, and dry the area before moving on.
Follow mesh direction
Follow mesh direction is a detail step. Use light pressure, keep the cloth or brush clean, and dry the area before moving on.
Avoid crushing the filter
The biggest mistakes usually come from rushing: using the wrong cleaner, skipping dry prep, letting residue sit, or cleaning in an order that creates more work. With range hood filter, patience protects both the surface and the result.
If you are unsure whether a cleaner, scraper, soak, or disinfectant is safe, check the product label and the appliance or surface manual. A careful pause is better than damaging a finish or leaving residue near food.
Clean corners and frame
For clean corners and frame, keep the process simple: remove loose soil, apply the right cleaner sparingly, give it time to work, wipe or scrub gently, and dry the area before moving on.
Grease collects along edges
Grease collects along edges is a detail step. Use light pressure, keep the cloth or brush clean, and dry the area before moving on.
Use a detail brush
Use a detail brush is a detail step. Use light pressure, keep the cloth or brush clean, and dry the area before moving on.
Repeat for heavy buildup
For repeat for heavy buildup, keep the process simple: remove loose soil, apply the right cleaner sparingly, give it time to work, wipe or scrub gently, and dry the area before moving on.
Soak again
Soak again is a detail step. Use light pressure, keep the cloth or brush clean, and dry the area before moving on.
Use more patience instead of force
Use more patience instead of force is a detail step. Use light pressure, keep the cloth or brush clean, and dry the area before moving on.
Step 4: Rinse and Dry Completely

This section focuses on step 4: rinse and dry completely as part of the larger job of cleaning range hood filter. The goal is to handle the mess in the right order, protect the surface, and avoid spreading residue to clean areas.
Work calmly through the steps below. If the surface reacts poorly, the part does not remove easily, or the cleaner label conflicts with this guide, stop and follow the manufacturer instructions.
Rinse until water runs clear
For rinse until water runs clear, keep the process simple: remove loose soil, apply the right cleaner sparingly, give it time to work, wipe or scrub gently, and dry the area before moving on.
Remove soap
Remove soap is a detail step. Use light pressure, keep the cloth or brush clean, and dry the area before moving on.
Remove loosened grease
Remove loosened grease is a detail step. Use light pressure, keep the cloth or brush clean, and dry the area before moving on.
Shake out trapped water gently
For shake out trapped water gently, keep the process simple: remove loose soil, apply the right cleaner sparingly, give it time to work, wipe or scrub gently, and dry the area before moving on.
Hold over sink
Hold over sink is a detail step. Use light pressure, keep the cloth or brush clean, and dry the area before moving on.
Avoid bending mesh
The biggest mistakes usually come from rushing: using the wrong cleaner, skipping dry prep, letting residue sit, or cleaning in an order that creates more work. With range hood filter, patience protects both the surface and the result.
If you are unsure whether a cleaner, scraper, soak, or disinfectant is safe, check the product label and the appliance or surface manual. A careful pause is better than damaging a finish or leaving residue near food.
Dry before reinstalling
For dry before reinstalling, keep the process simple: remove loose soil, apply the right cleaner sparingly, give it time to work, wipe or scrub gently, and dry the area before moving on.
Towel dry
Towel dry is a detail step. Use light pressure, keep the cloth or brush clean, and dry the area before moving on.
Air dry fully
Air dry fully is a detail step. Use light pressure, keep the cloth or brush clean, and dry the area before moving on.
Prevent drips into hood
Prevent drips into hood is a detail step. Use light pressure, keep the cloth or brush clean, and dry the area before moving on.
Step 5: Clean the Hood Area Around the Filter
This section focuses on step 5: clean the hood area around the filter as part of the larger job of cleaning range hood filter. The goal is to handle the mess in the right order, protect the surface, and avoid spreading residue to clean areas.
Work calmly through the steps below. If the surface reacts poorly, the part does not remove easily, or the cleaner label conflicts with this guide, stop and follow the manufacturer instructions.
Wipe the filter slot
For wipe the filter slot, keep the process simple: remove loose soil, apply the right cleaner sparingly, give it time to work, wipe or scrub gently, and dry the area before moving on.
Grease at edges
Grease at edges is a detail step. Use light pressure, keep the cloth or brush clean, and dry the area before moving on.
Dust and residue
Dust and residue is a detail step. Use light pressure, keep the cloth or brush clean, and dry the area before moving on.
Clean the underside of the hood
For clean the underside of the hood, keep the process simple: remove loose soil, apply the right cleaner sparingly, give it time to work, wipe or scrub gently, and dry the area before moving on.
Use degreaser carefully
Use degreaser carefully is a detail step. Use light pressure, keep the cloth or brush clean, and dry the area before moving on.
Avoid electrical areas
The biggest mistakes usually come from rushing: using the wrong cleaner, skipping dry prep, letting residue sit, or cleaning in an order that creates more work. With range hood filter, patience protects both the surface and the result.
If you are unsure whether a cleaner, scraper, soak, or disinfectant is safe, check the product label and the appliance or surface manual. A careful pause is better than damaging a finish or leaving residue near food.
Check fan performance
For check fan performance, keep the process simple: remove loose soil, apply the right cleaner sparingly, give it time to work, wipe or scrub gently, and dry the area before moving on.
Persistent smoke
Persistent smoke is a detail step. Use light pressure, keep the cloth or brush clean, and dry the area before moving on.
Weak suction
Weak suction is a detail step. Use light pressure, keep the cloth or brush clean, and dry the area before moving on.
When professional service may be needed
When professional service may be needed is a detail step. Use light pressure, keep the cloth or brush clean, and dry the area before moving on.
How Often to Clean a Range Hood Filter
Clean range hood filter lightly whenever spills or grease appear, then schedule a deeper reset monthly or as needed based on cooking volume, odor, visible buildup, and manufacturer guidance.
Light cooking
For light cooking, keep the process simple: remove loose soil, apply the right cleaner sparingly, give it time to work, wipe or scrub gently, and dry the area before moving on.
Monthly or as needed
Monthly or as needed is a detail step. Use light pressure, keep the cloth or brush clean, and dry the area before moving on.
Watch for sticky film
Watch for sticky film is a detail step. Use light pressure, keep the cloth or brush clean, and dry the area before moving on.
Frequent frying
For frequent frying, keep the process simple: remove loose soil, apply the right cleaner sparingly, give it time to work, wipe or scrub gently, and dry the area before moving on.
Clean more often
Clean more often is a detail step. Use light pressure, keep the cloth or brush clean, and dry the area before moving on.
Heavy grease loads
Heavy grease loads is a detail step. Use light pressure, keep the cloth or brush clean, and dry the area before moving on.
Replacement schedule
For replacement schedule, keep the process simple: remove loose soil, apply the right cleaner sparingly, give it time to work, wipe or scrub gently, and dry the area before moving on.
Charcoal filter replacement
Charcoal filter replacement is a detail step. Use light pressure, keep the cloth or brush clean, and dry the area before moving on.
Damaged metal filters
Damaged metal filters is a detail step. Use light pressure, keep the cloth or brush clean, and dry the area before moving on.
Range Hood Filter Mistakes to Avoid
The biggest mistakes usually come from rushing: using the wrong cleaner, skipping dry prep, letting residue sit, or cleaning in an order that creates more work. With range hood filter, patience protects both the surface and the result.
If you are unsure whether a cleaner, scraper, soak, or disinfectant is safe, check the product label and the appliance or surface manual. A careful pause is better than damaging a finish or leaving residue near food.
Washing a charcoal filter
For washing a charcoal filter, keep the process simple: remove loose soil, apply the right cleaner sparingly, give it time to work, wipe or scrub gently, and dry the area before moving on.
It may lose function
It may lose function is a detail step. Use light pressure, keep the cloth or brush clean, and dry the area before moving on.
Replace instead
Replace instead is a detail step. Use light pressure, keep the cloth or brush clean, and dry the area before moving on.
Reinstalling while wet
For reinstalling while wet, keep the process simple: remove loose soil, apply the right cleaner sparingly, give it time to work, wipe or scrub gently, and dry the area before moving on.
Drips and odor
Drips and odor is a detail step. Use light pressure, keep the cloth or brush clean, and dry the area before moving on.
Possible damage risk
Possible damage risk is a detail step. Use light pressure, keep the cloth or brush clean, and dry the area before moving on.
Ignoring the hood body
For ignoring the hood body, keep the process simple: remove loose soil, apply the right cleaner sparingly, give it time to work, wipe or scrub gently, and dry the area before moving on.
Grease around filter frame
Grease around filter frame is a detail step. Use light pressure, keep the cloth or brush clean, and dry the area before moving on.
Reduced airflow
Reduced airflow is a detail step. Use light pressure, keep the cloth or brush clean, and dry the area before moving on.
Using the dishwasher without checking
For using the dishwasher without checking, keep the process simple: remove loose soil, apply the right cleaner sparingly, give it time to work, wipe or scrub gently, and dry the area before moving on.
Finish damage
Finish damage is a detail step. Use light pressure, keep the cloth or brush clean, and dry the area before moving on.
Loose grease in dishwasher
Loose grease in dishwasher is a detail step. Use light pressure, keep the cloth or brush clean, and dry the area before moving on.
Frequently Asked Questions

These quick answers cover the questions readers usually have before they start cleaning range hood filter. Keep answers practical, but follow the more detailed sections above when the surface is delicate or the mess is heavy.
Can I put a range hood filter in the dishwasher?
The practical answer is to clean range hood filter in stages: remove loose mess, use a surface-safe cleaner, rinse or wipe away residue when required, dry fully, and repeat maintenance before buildup becomes stubborn.
How often should I clean my range hood filter?
Clean range hood filter lightly whenever spills or grease appear, then schedule a deeper reset monthly or as needed based on cooking volume, odor, visible buildup, and manufacturer guidance.
How do I degrease a metal hood filter?
The practical answer is to clean range hood filter in stages: remove loose mess, use a surface-safe cleaner, rinse or wipe away residue when required, dry fully, and repeat maintenance before buildup becomes stubborn.
Can charcoal range hood filters be washed?
The practical answer is to clean range hood filter in stages: remove loose mess, use a surface-safe cleaner, rinse or wipe away residue when required, dry fully, and repeat maintenance before buildup becomes stubborn.
Why is my range hood still greasy after cleaning?
The practical answer is to clean range hood filter in stages: remove loose mess, use a surface-safe cleaner, rinse or wipe away residue when required, dry fully, and repeat maintenance before buildup becomes stubborn.
When should I replace a range hood filter?
For when should i replace a range hood filter?, keep the process simple: remove loose soil, apply the right cleaner sparingly, give it time to work, wipe or scrub gently, and dry the area before moving on.
Final Thoughts
Cleaning range hood filter is easier when the job has a clear order. Remove loose mess first, use the mildest effective cleaner, protect food-contact areas, dry the surface, and repeat small maintenance steps before buildup becomes difficult.
For important safety questions, rely on product labels, appliance manuals, and trusted public-health or government guidance rather than shortcuts that sound dramatic but are hard to verify.

Ethan Carter is the Founder & Editor of HomeCleanSecrets. Based in the United States, he has 5 years of experience creating practical home cleaning, laundry care, stain removal, decluttering, and home organization content. His goal is to help everyday households clean smarter and build simple routines that are easier to maintain.
Read more about Ethan Carter on his author page: https://homecleansecrets.com/ethan-carter/